Showing posts with label i baked this. Show all posts

Monday, September 14, 2015

Pumpkin Spice Donuts with Cinnamon Maple Glaze


'Tis the season for all things pumpkin spice.  And if you are getting  married, like my forever friend Rachelle is, it only makes sense to have pumpkin spice donuts at your bachelorette  party.  And that's why I'm here: To bake you your wildest dreams.

Please excuse the boy parts in this picture, it is a bachelorette party after all!  ;)

Etsy helped me find the perfect accessory:  Diamond ring picks to make the donuts look like engagement rings.  =D  Super fast shipping too, this Etsy seller saved my butt.

The diamond picks were the perfect touch and passed all required taste tests.


Baked Pumpkin Spice Donuts
Makes approx 16 donuts.Bake for 10-11 minutes at 325*

Ingredients:
2 c. flour
2 tsp baking powder
1/4 tsp baking soda
1/2 tsp ginger
1/2 tsp nutmeg
1 tsp cinnamon
a pinch of ground cloves
1/4 c. butter, room temp
1/4 c. sugar
1/2 c. light brown sugar, packed
2 eggs, room temp
1/4 c. milk
1 tsp vanilla
1 c. pumpkin pie

Directions:
1. In a medium bowl, whisk together all dry ingredients and set aside.
2. In a stand mixer fitted with the paddle attachment, cream butter on high.
3. Add both sugars to butter and continue mixing on high until smooth. Add eggs one a time.
4. Reduce speed to medium and add pumpkin, vanilla and milk. Continue beating until mixture is smooth.  It will be slightly grainy.
5. Slowly add in dry ingredients mixture, beat until combined.
5. Transfer batter into a pastry bag or zip lock bag with a corner snipped off and pipe batter into the wells of a buttered donut pan.  Fill no more than 2/3 of the way.
6. Bake in oven for aprox. 10- 12 minutes or until the donuts rise and are springy to touch.
7. Let donuts cool a few minutes before transferring them to a wire rack to cool.

Cinnamon Maple Glaze

Ingredients:
1 c. powdered sugar, sifted
1/2 tsp. cinnamon
1 tbsp. good maple syrup
1 tbsp. milk (more or less as needed)

Directions:
1. Sift powdered sugar in a large bowl.
2. Add cinnamon.
3. Make a well in the center  of the sugar with your finger.
4. Pour the maple syrup and milk into the well.
5. Stir together with a whisk.
6. Add more milk, 1/2 a tablespoon at a time, if needed.  The glaze should come together, shiny and smooth with no clumps.
7. Dip the tops of your donuts into the glaze, making sure to coat the top completely.
8.  Set donuts on a rack to set the icing, about 30 minutes.
9. Insert picks into ends of donuts.


The glaze was perfect, you only need one coat.   The great flavor was largely aided by quality maple from Canada and a healthy dash of cinnamon.  Oh and all the good vibes I was sending its way.


Congrats Rach, I'm so excited for you.  I can't wait for the big day!

xoxo,
Anna

Monday, March 16, 2015

St. Patrick's Day Chocolate Mini Donuts


My friends' annual St. Patrick's Day Dinner was held last Saturday, March 14th, which was also Pie Day.  So while most of the baking bloggers out there were furiously making, eating and Instagramming pie,  I was in my kitchen making donuts.  I was just not ready to have Pie Day trump St. Patty's Day.  Or have pies trump donuts.  Or maybe i'm just a donut loving rebel like that.

Correction; a bright green, sprinkle topped, baked - not fried - chocolate mini donut loving rebel.

They're super easy to make.  Super delicious to eat.  And the only special equipment you need for these bad boys is a mini donut pan.  So it really is worth the cost, trust me.

And making mini (as opposed to normal-sized) donuts means you can guiltlessly eat half a dozen of them because they're just so itty bitty!  You better eat them fast, too.  Because they will disappear.


Mini Chocolate Donuts
Makes aprox 30 donuts.   Bake for 7 minutes at 325*
Adapted from Joy the Baker.

Ingredients:
1 c. flour 
1/4 c.  unsweetened cocoa powder 
1/2 tsp baking soda 
1/4 tsp table salt 
1 pinch of nutmeg
1/2 c.  light brown sugar, packed 
1/2 c. buttermilk 
1 large egg 
4 tblsp unsalted butter, melted until just browned 

1 tsp vanilla extract

Directions:
1. In a medium bowl, whisk together flour, cocoa powder, baking soda, salt, nutmeg and brown sugar and set aside.
2. Melt butter in a small saucepan.
3. In a separate bowl, whisk together buttermilk, egg, melted butter, and vanilla extract.
4. Pour the wet ingredients into the dry ingredient bowl , folding all ingredients together with a spatula until well combined.   
5. Transfer batter into a pastry bag or zip lock bag with a corner snipped off and pipe batter into the wells of a buttered mini donut pan.  Fill no more than 2/3 of the way.  (Trust, if you over batter you will have mini Bundt cakes instead of mini donuts!)
6. Bake in oven for aprox. 7minutes or until the donuts rise and are springy to touch. 
7. Let donuts cool a few minutes before transferring them to a wire rack to cool.

Tip:  In case you didn’t listen to me, and you over filled your donut pan too much and your mini donut/bundt cakes have no hole, use a toothpick or end of a small spoon to hollow one out.


Glaze
Adapted from SprinkleBakes.


Ingredients
2 c. powdered sugar, sifted
1 tsp.  vanilla
3-5 tablespoons whole milk
3-4 drops green food coloring 

Directions
1. Sift powdered sugar in a large bowl.
2. Make a well in the center  of the sugar with your finger.
3. Pour the vanilla extract, food coloring  and 1 tablespoon of milk into the well. 
4. Stir together with a whisk.
5. Add more milk, 1/2 a tablespoon at a time, as needed.  The glaze should come together, shiny and smooth with no clumps.  Don't add too much milk.  I used about 3.5 table spoons total, but this will vary for you.   
6.  Add additional food coloring if needed.  (Use gel food coloring if possible, I used Winton's "Leaf Green".)
7. Dip the tops of your donuts into the glaze, making sure to coat the top completely.  If the donut hole is covered or clogged, poke through with a spoon.
8.  Set donut on a rack to set the icing.  
9. When you are done dipping all your donuts, repeat the process one more time.  Two coats makes the icing more opaque and the color will look much better.  
10.  Add any sprinkles to the donuts while the donut glaze is still wet. 
11. Let donuts set completely, about 30 minutes. 


I have never used sprinkles so sparingly before!  I added a few very strategically placed white sprinkles and just one little shamrock.

Donut worry though,  I will be back to covering everything in sprinkles again next week.


Have a great St. Patrick's Day friends!  Eat plenty of carbs, drink responsibly, wear green and always, always double dip your mini donuts.


But make sure you get your fill of green things, shamrocks and Irish kisses.  'Cuz I am ready for some pastel bunnies up in here!

xoxo,
Anna


P.S. For more St. Patrick's Day inspired treats, check out my Lucky White Chocolate Chip Cookies or my  Wet Chocolate Irish Coffee Cupcakes .


Monday, December 8, 2014

Rudolph the Reindeer Cookies


I have not decided if I love the holidays because of the family, friends and food that joyously fill the season  OR if I just really like reindeer antlers. =D  On my baked goods.  On my socks.  On my head.

Last year I made gingerbread latte cupcakes in a jar to match the antlers on my head for my good friend's Holiday party.  Naturally, since I re-wore the same antlers to this year's party, I had to find another treat that would look great with antlers.  And big red noses.

These Rudolph cookies take a little time to put together, but they aren't difficult to make.  With some free time and a helper Christmas elf or two you may want to try them this year for yourself to liven up your own holiday parties.


Reindeer Gingerbread Cookies
Makes 30 2-inch cookies.  

Ingredients/Supplies
Your favorite gingerbread roll out cookie dough recipe*
2-inch round cookie cutter
1 bag white Candy Melts
1 bag light brown Candy Melts
Various sprinkles;  I used silver sprinkles, pearls, white snowflakes and pink hearts
Wilton eye candies
Red candy (M&M's, jelly beans, etc)

*I used this one from The Decorated Cookie. The only difference is that I needed to add a lot more flour once I started rolling out the dough.

Directions/Assembly:
1.  Prepare dough as directed.  Cut out faces using a 2-inch round cookie cutter.  Bake and set out to cool.
2.  Melt white Candy Melts in microwave and pipe antlers onto wax paper.  I did this freehand, but you can find a stencil on the internet as well.
3.  Place various sprinkles onto antlers while they are still wet. Silver sprinkles look like snow!
4. Let dry. You can speed up this process in a freezer.
5.  Once cookies are completely cool, melt brown Candy Melts and using a small spatula or butter knife to spread a thick coat over cookies.
6. While the candy melt is still wet, press antlers to top of cookies. Hold in place a few seconds.
7. Press Wilton eye candies below antlers.
8. Press red candy under the eyes. (or brown/black candy if you want regular reindeer instead of Rudolphs)
9.  Let cookies dry for 15 minutes before moving.

You can use all kinds of sprinkles for these cookies. And if you use an edible pen you can change the look of the eyes as well.  Add the slighlty different shaped noses and antlers and they can take on so many different personalities!

I added little hearts to some of the antlers because who said that Rudolph couldn't have secretly been a girl???


I also tried making some "regular reindeer".  Instead of a red candy nose, I used a large upside down chocolate chip.


They were still cute, but c'mon.  We know what we want during the holidays.  THAT RED NOSE.


I also used these cookies the following day for Rachelle's annual holiday cookie exchange.  I couldn't bake two separate  yummies in one weekend... there are not enough hours in the day, I am not Beyonce.

I hope everyone's holidays have started off as wonderful as mine.  I am knee deep in gingerbread lattes and cookies, burlap tree skirts and woodland creatures and we are only half way into December.  Can't wait for the rest of it!  There's still deep fried turduckens to eat, tamales to make, and Christmas Cheer to spread.

xoxo,

Anna

P.S. Oh, and just so you guys know.  I think it's time to retire the antlers.  I have gotten much good use from them the last two years.  What's next?  Elf ears?  How can I dress up like a penguin?  Anyone know?


Tuesday, June 10, 2014

Puff Pastries: Inspired by miette


Hey guys, I lied a little.  Well no, I lied a lot.  Instead of properly preparing for Colombia by only eating lettuce and dustballs for the last three weeks, I have been eating big ol' burgers and  lots of  fancy artisan ice cream instead.  It's hot and ice cream is good okay?  Can ice cream be my spirit animal?  Is that possible?  Or just weird? Oh it's definitely weird... okay, I was just kidding anyway.

This last minute treat was completely justified though.  It was a baking date with the fair Rachelle and it allowed me to get some quality time in (with her and a toy I hadn't played with before) AND have something to blog out!  Win-win. She emailed me, suggesting eclairs and it only made sense to proceed with our endeavour since we had both bookmarked a recipe in our miette cook books ages ago.  I first went to miette  about two years ago and fell in love with their colors and decor, the whole shop and of course... the pastries!  We each have our own copies.  They both came in handy.


I was reminded of a very important life lesson on our date.  You can't always be perfect.  And that's okay because chocolate ganache and sprinkles can, in fact,  fix most anything.

This applies to broken hearts (obviously) or puff pastries.  But today I am talking about the latter.  Neither of us had made puff pastries before.  We certainly did not excel at our task.  We did quite a few things wrong, actually.

Our biggest mistake was assuming that we knew better than our cook book.  We were directed to pipe the puff pastry into 5x1 inch strips using a 1/2 inch diameter piping tip.  We used math and convinced ourselves that they must have meant TWO strips. Two strips of dough would bake itself together, right?


Wrong.  As evidenced above, we ended up with really big donuts... that could be divided into two.  Like one of those popsicles from childhood.  I get strawberry, you get orange but we break them in half and share!  Not much of a pretty sight to see.

And piping into them was much of a disaster since they didn't fluff up properly and we had to fill them in at least two places!  Pastry cream all over the place!  At least I got to use my cool little machine though...

Yet we had a great time laughing over our mistakes and then trying our best to fix them.  This is where we were saved by chocolate and sprinkles, the real heroes of today's story.

We zig zagged the ganache instead of dunking them.  (Bonus:  You can see the vanilla bean specks!)


We added some straight-from-miette sugar flowers to the prettiest ones.  ... and ta-dah.


We had eclairs!


We had cream puffs!


Sure there's a few flaws in them but thats okay!  At the very least TWO of them looked and photographed wonderfully,right?  ;)  Plus they were delicious. Just like an eclaire should taste like.   And we had an awesome afternoon.  We didn't let puff pastries defeat us!

I am quite confident that for our next date, Rach and I will master our technique and I will bring something even prettier to share!

xoxo,
Anna

(For the recipe, I encourage you to buy the miette book and follow the directions properly. I don't like to post exact recipes from books, nor will I post recipes when I don't think I have the recipe down enough.  Soon though, soon!)

Tuesday, October 29, 2013

Oatmeal Pumpkin Spice S'mores Cookies


Oh hai guys.  I'm just going to pretend that I have not been neglecting this blog for two months.

And what better way to break the ice than with Fall's It Flavor:  Pumpkin Spice.  

You know you love/hate it.  It's everywhere.  Ice cream, coffees, donuts, trail mix, pancakes, pop tarts, tea... It's out of control.  Sometimes its overly sugary and disgusting, sometimes it's pumpkin spice heaven.  I have had pumpkin pancakes that make it taste like fall exploded in my mouth.  And I have thrown away an entirely full container of TJ's pumpkin spice chai tea latte mix that made my teeth hurt after one sip.  It's a pumpkin spice gamble.  

No gamble here, however.  These Oatmeal Pumpkin Spice S'mores Cookies are not sugary and disgusting despite having so many components.  The pumpkin is subtle, the dark chocolate not too bitter and the oats help to balance out the sweetness of the marshmallow glaze.  Yes you heard right, these cookies will give you the taste of a sweet marshmallow glaze in every bite. 


Oatmeal Raisin S'mores Cookies
Makes 25, bake at 350* for about 12 minutes.

Cookies
1 c. flour
2 1/2 c. oats
1 tsp cinnamon
1/2 tsp salt
1/2 tsp nutmeg
1/4 tsp ginger
1/4 tsp cloves
1/4 tsp baking soda
1 1/2 c. light brown sugar
1/2 c. butter, room temperature
1 egg
1 tsp vanilla
1/2 c. pumpkin puree
1 c. dark chocolate chips 

Directions:
1. Sift flour, cinnamon, salt, nutmeg, ginger, cloves and baking soda together in a bowl.
2. In a stand mixer, cream butter and sugar together until fluffy, around 5 minutes.  Add in egg and vanilla and beat until smooth. Add pumpkin puree and beat until smooth. 
3. On low, slowly add flour mixture to wet mixture and continue mixing until fully incorporated.
4. Turn off stand mixture and fold in oats and chips by hand.
5. Scoop dough onto lined cookie sheets and bake until edges start to slightly brown.  Remove from oven and let cook on a wire rack.  

Marshmallow Glaze
1 c. powdered sugar
1 tsp milk
3 tbsp butter
1 c. mini marshmallows

Directions: 
1. In a saucepan over low medium heat, melt butter completely.
2. Add marshmallows and stir until melted into butter.
3. Add milk and stir, remove from heat.
5. Slowly add powdered sugar and whisk mixture quickly until no lumps remain.
6. Pour over cooled cookies.  


I made these for no other reason than because I still owed people cookies from my AIDS Walk fundraising that I started back in April. Ha.  Hey, when it's hot it makes it really hard to bake.  Alas, it is now late October and the last heat wave from our California Indian Summers seems to have left us for good.  Chilly Fall mornings try to make me put on pants now. I'm resisting the pant wearing part of Fall, but the baking part?  I think it's time to embrace it wholeheartedly. I don't mine wearing aprons (or awesome baking gloves) one bit. 

xo,

Anna 


Wednesday, June 12, 2013

Fresh Strawberry Muffins with Cinnamon Oatmeal Walnut Almond Streusel


I feel guilty, opening up this text box and starting a new blog like I haven't been MIA for almost two months.  Life blew up.  Sorry?  It doesn't mean I wasn't baking this whole time.  If you follow me on IG you know I'm in the kitchen almost every weekend.  I just didn't have time to blog about it all.  Work, Life, Sunshine... all that got in the way of me blogging.  Life has finally calmed down now, so I am able to play catch up. Starting with these muffins I made for my mom for Mother's Day... back in May.

I've mentioned before that I hate giving my mom any of my baking because she dislikes sweets and always says the same thing;  "Too much sugar!".  Drives me crazy.  So she got something without any frosting or icing or chocolate.  She got something full of strawberries.


Strawberries make me think of my childhood.  Although I am not from Watsonville, growing up we had family there so I learned to walk in the strawberry fields.  And one of my oldest memories is eating strawberries in the backyard after a summer rain, staring at the resulting rainbow.  Yes, I'm serious that is an actual memory.  I also had a puppy but she must have been elsewhere that day.  In any case, it felt appropriate to make these for my mom. 


Fresh Strawberry Muffins
Makes 15, Bake at 350* for 18 minutes

2 cups+ 2 tbls flour
1 tsp baking soda
1 tsp baking powder
1/2 tsp salt
2/3 cup sugar
1 tsp cinnamon
2 eggs
1/4 cup oil
2 tsp vanilla
1/2 cup greek yogurt
1 cup diced, floured, fresh strawberries

Directions:
1. In one bowl, mix dry ingredients together and set aside.
2. In stand mixer bowl, add wet ingredients and stir until well combined.
3. Add flour mixture to wet mixture, 1/2 c at a time and mix on low until well incorporated.
4. Pour batter into lined muffin tins.

Cinnamon Oatmeal Walnut Almond Streusel:
2 tablespoons slivered almonds
1/3 cup walnuts
1/4 cup oats
1/4 cup flour
1/2 cup brown sugar
1 tsp Cinnamon
3 tablespoons melted butter

Directions
1. Mix together nuts, oats, flour, sugar and cinnamon.
2. Melt butter and pour over mixture. Knead together.  Mixture should be clumpy.
3. Measure out 1 tablespoon of streusel and sprinkle directly on top of batter in muffins tins.
4. Bake in oven for about 18 minutes.


I'm saving this recipe here and in my brain.  I love this streussel topping on most anything but on top of muffins filled with fresh berries?  Yum.   Eat these warm, right out of the oven or warm them in the toaster oven first.  You will be glad you did.


I promise I will be back sooner than 2 months from now.  :)

xoxo,
Anna

Sunday, April 21, 2013

b.patisserie Review & Brownie Cookies


Hi friends.  Sorry I have been quiet lately.  I have been pretty busy eating pastries and packing on the pounds.  That sentence is hilarious (not hilarious)  because it's 100% true. Yes, I have been baking a lot the last few weeks but I have been eating a lot more baked goods than normal.  A lot. People keep BRINGING me things and I can't say no.  And I really, really, really couldn't say no when my company's president walked through the door with a box of pastries from b. patisserie for me.  Yes, a box for me.  To myself.

b. patisserie is a new bakery that opened in San Francisco a few weeks ago.  The pastry chef is Belinda Leong.  She bakes MAGIC.  There's no way to describe it but magic.  I first had her  infamous kouign amann last fall at an underground food market.  There was frozen custard in the middle of it so it was delicious for sure but the pastry was the star.  I had to find out what it was, who made it and of course how to pronounce this "kouign amann" thing.  Because it really was amazing - life changing and I have honestly stalked her since.  You can read the many good reviews here, here, here... the list goes on.


When I found out she was opening up her own bakery and I would be able to get those bad boys with so much more ease, I was ecstatic.  I told everyone, including my co-workers.  I also whined a little (a lot) about how far and inconvenient it is from work.  (I may work in the city but I only know how to get to the ballpark to see my Giants on MUNI, nowhere else. )  Which is why despite my excitement, I dragged my feet at actually visiting the shop.  I still have to!  I must.  There are too many friends with sweet tooths that I plan to bring here.  The shop has a macaron tree.  A MACARON TREE.  How can I not go?


In any case, I was brought back the delicious kouign amann - think of a croissant but sweeter.  The sugar actually pools inside the middle of the pastry.  It's divine.


And a raspberry grand macaron.  Yes, it tastes as good as it looks.  It's about 3x the size of your average macaron. That's why it's a grand  macaron.


Best macaron I have ever had.  The fresh raspberries totally make the treat.  I wish I had one right now.  So did my little kitchen mascot, Andy. I didnt give him any though.  (Meet Cupcake Andy.  He likes sweets.   He's as big as a grand macaron.)

What does this have to do with cookies you may ask?  Well, while amiss my stalking the poor  pastry chef online I stumbled upon a link to a recipe of hers featured in Food & Wine.  Brownie Cookies!  They're cookies but they taste JUST like brownies.  I printed out the recipe immediately and made no adjustments to the recipe.  I have some tips, of course I have tips, but no adjustments.

THESE ARE SUPER CHOCOLATEY.  You have been warned.  If you don't like chocolate, I can see how they could turn you off.  But if you love chocolate like me, then YUM.  A tall glass of milk next to you is recommended though.  :)


Brownie Cookies

From b. patisserie pastry chef Belinda Leong, as found in Food & Wine
Makes 3 dozen, bake at 350% for 10 minutes.

Ingredients:
1 pound semisweet chocolate, chopped
4 tablespoons unsalted butter
4 large eggs, at room temperature
1 1/2 cups sugar
1 teaspoon pure vanilla extract
1/4 teaspoon salt
1/2 cup all-purpose flour, sifted
1/2 teaspoon baking powder
One 12-ounce bag semisweet chocolate chips

Directions:

1.In a large bowl set over a saucepan of simmering water, melt the chopped chocolate with the butter, stirring until smooth.
2. In another large bowl, using a handheld electric mixer, beat the eggs with the sugar at medium speed until thick and pale, about 5 minutes.
3. Beat in the vanilla and salt.
4. Using a rubber spatula, fold in the melted chocolate.
5. Fold in the flour and baking powder.
6.Stir in the chocolate chips.
7. Scrape batter into a shallow baking dish, cover and freeze until well chilled and firm, about 1 hour.
8. Working in batches, scoop 2-tablespoon-size mounds of dough onto the prepared baking sheets, about 2 inches apart.
9 .Bake for about 10 minutes, until the cookies are dry around the edges and cracked on top. Let the cookies cool on the baking sheets for 10 minutes, then transfer to a rack to cool completely before serving.

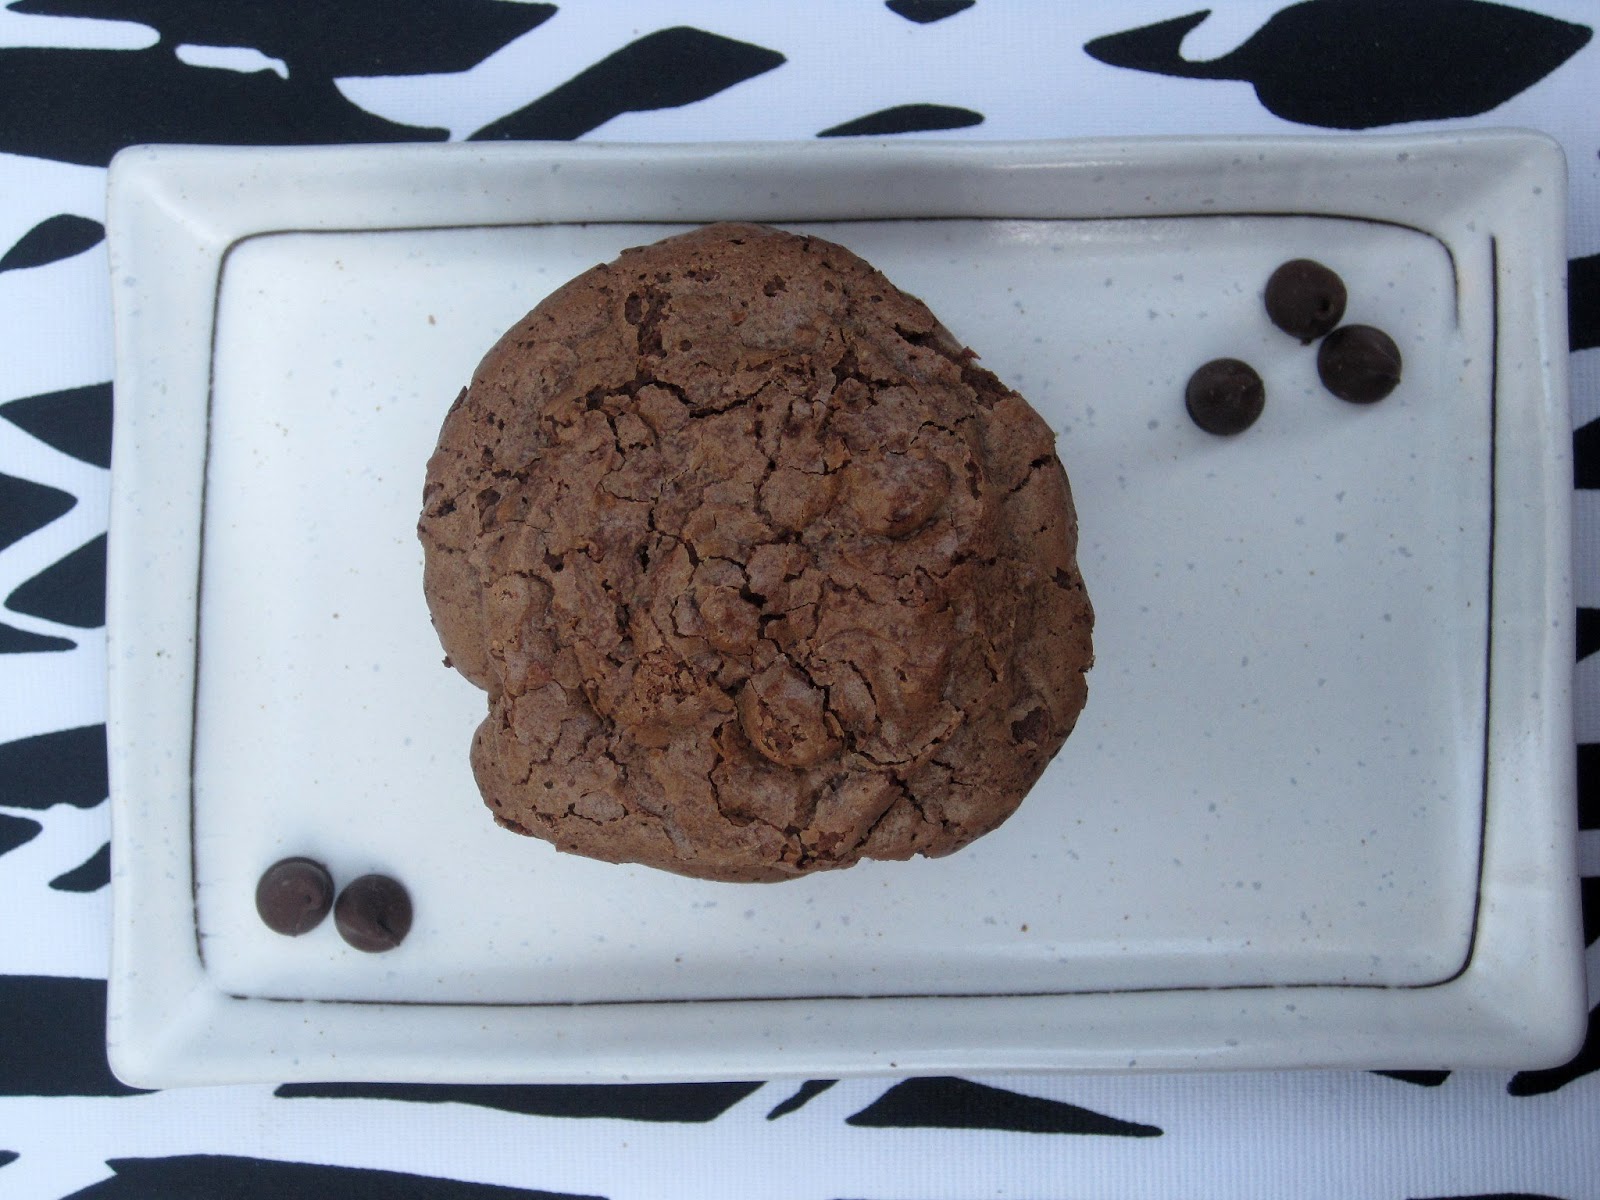
See below for what the cracks looks like.  This is okay.  It means the delicious is trying to break through!


My tips to you is to melt the chocolate very carefully, make sure that the water does not boil or hit the bottom of the bowl to prevent your chocolate from seizing.  Also, when it says to work in batches that means that the dough is very very melty. There is hardly any flour in these, so keep it in the freezer in between your batches.  Also, bake them exactly as directed.  Lots of cookies will taste okay or even better slightly under cooked but not these.  Make sure the tops are cracking to prevent having raw cookies.

I brought them into work and they were gone by 11:00AM.  They called me a cookie monster.


Do you see the compact chocolaty goodness in there? Yeah, I do too.

So in summary, because Yes I am aware that I ramble, make these cookies if you love chocolate and have a tall glass of milk.  And go to b. patisserie right now.   Just make sure "right now" is before 11:00 AM because they run out of pastries fast.  The first time my co-worker went, it was 1:00 PM and all she could bring me back was their business card.  Don't make the same mistake. Unfortunately, it is not edible so it cannot satisfy your sweet tooth.

xoxo,
Anna


Update July 2013:

I went!!! And it was Amazing.  The Macaron tree had changed over to Summer already.


The details are actually pretty amazing on this tree.  I was impressed.


I pined after the pretty yellow chairs.


Stared open mouthed at the stack of FRUIT filled Kouigns.


And then enjoyed a pastry... or two WITH a cup of coffee.   All is well with the world!!!


Wednesday, March 27, 2013

Carrot Cupcakes with Marshmallow Bunny Toppers


I went to Target earlier this month and bought a bag of bunny shaped marshmallows.  I also bought a bag of Haribo gummi bunnies (who knew they existed?).  Yup, my love of  bunnies has been going strong.  I have only found use for the marshamallows thus far.  This means that I will be eating a whole bag of gummi bunnies soon.  And I guess I HAVE to eat the leftover adorable bunny marshmallows too, right?  I don't believe in wasting time.  Or candy.   Welcome to eat like an easter rabbit month here at My Feelings Taste Like Cupcakes Headquarters.  :)  All bunny, all the time.  I'm totally wearing rabbit ears as I type this*.


You saw my post from earlier this week, my cupcakes in a jar?  Well I made more cupcakes than I had jars.  Cupcakes sans jars are easier to distribute anyways.  But I wasn't sure how to top them. I had some easter bunny sprinkles... but the frosting on these is so delicious that I didn't want to throw the flavors off balance with too much sugar.

And then I found the marshmallows in my baking cupboard.   Just add toothpicks and it's so easy it's really frankly cheating. =x

But they look so adorable I don't care.  I love the little guys hopping over mounds of cream cheese frosting, skipping over the walnuts with such ease.  They're living the life!

They're the same recipe as before, obviously.  Can't stress it enough, make these.  The cupcakes are amazing.

Wouldn't you love to get him in your Easter basket?


No I lie, you want him and all of his bunny friends with you.  What do you call that?  A family?  Not a herd, not a school...  I'm googling now because I bet you're dying to know.  You're welcome.  


A COLONY.  YOU WANT A WHOLE COLONY OF EASTER BUNNY MARSHMALLOW CARROT CUPCAKES.  Wow, my blog is educational now too.  You are DOUBLE welcome.

Do you know who doesn't care about these cupcakes though? Poodles.  Poodles do not care about cupcakes.  They just care about getting in the way of my shots.


Happy Easter everyone! From me and my spoiled poodles.  May you stay away from peep shows. And may I stay away from that ENTIRE bag of gummy bunnies.

xoxo,
Anna

*No I'm not.  Or am I?

Sunday, March 24, 2013

Rabbit Food: Carrot Cupcakes In A Jar


I am having rabbit issues this week.  During Christmas, if you follow me in Instagram, you will remember that I was OBSESSED with gingerbread men.  And then with foxes on my clothes.  This season it's bunnies.   It started when I found these little Easter rabbit figurines (jax!) at Walmart.  I had been wanting to make cupcakes in a jar for months and thought they'd work well for some special Easter treats.  DIY, cute packaging, spray paint?  Right up my alley.

I spray painted the seals white and the rims baby blue and glued the bunnies on top.  I used smaller mason jars, the half pint glass ones.  It took a few days to let the paint dry but it was a fun project! Purple or green would have been cute too.


What kind of cupcakes did I bake?  Well my new motto is "eat like an Easter rabbit"!  So I did. They're carrot cake cupcakes of course. Rabbits may eat carrots, but Easter Rabbits eat sugar, for sure.  I used the same recipe last year, and still can't be happier with the taste and texture. Love the pineapple and the walnuts in the batter.  You can go here to see the recipe.

The frosting I changed up slightly, it's still pineapple cream cheese frosting but I used  2 tablespoons of pineapple-apricot preserves instead of pineapple juice.  Either will work, but I liked the stronger flavor that came through by using the preserves.

Jar Assembly

1. Bake as directed, let cool completely & cut in half, horizontally.
*If you don't wait for them to cool they will fog up your little mason jars.  Be patient.
2. Layer them into the jars: Cake, frosting, cake, frosting, cake frosting.
*You can either fit one or one and half cupcakes inside one half pint jar, depending on how generously you frost.
* I used a 1M tip and moved the jar as I squeezed.  My tip to you is NOT to frost against the glass, but about 1/2 an inch away from it to keep it clean and pretty.  When you put the cake on top, press down slightly and it will move the frosting to the edge.
3. Before you place a cap over them, add additional garnish to the top of the jars.


I tied them off with white and gold baker's twine and included those little wooden ice cream spoons.


  What child, or adult would not love getting one of these?  Best part it that you can keep the jar once the cupcake has been eaten, and save it to store something else.  That's a gift that keeps on giving right there.


This bunny is just TOO cute.  I can't get enough of him.  Or his little wooden spoon.


Happy almost Easter guys!  You will get one more Bunny post out of me this week, so stay tuned!

xoxo,
Anna