Showing posts with label green. Show all posts

Monday, March 16, 2015

St. Patrick's Day Chocolate Mini Donuts


My friends' annual St. Patrick's Day Dinner was held last Saturday, March 14th, which was also Pie Day.  So while most of the baking bloggers out there were furiously making, eating and Instagramming pie,  I was in my kitchen making donuts.  I was just not ready to have Pie Day trump St. Patty's Day.  Or have pies trump donuts.  Or maybe i'm just a donut loving rebel like that.

Correction; a bright green, sprinkle topped, baked - not fried - chocolate mini donut loving rebel.

They're super easy to make.  Super delicious to eat.  And the only special equipment you need for these bad boys is a mini donut pan.  So it really is worth the cost, trust me.

And making mini (as opposed to normal-sized) donuts means you can guiltlessly eat half a dozen of them because they're just so itty bitty!  You better eat them fast, too.  Because they will disappear.


Mini Chocolate Donuts
Makes aprox 30 donuts.   Bake for 7 minutes at 325*
Adapted from Joy the Baker.

Ingredients:
1 c. flour 
1/4 c.  unsweetened cocoa powder 
1/2 tsp baking soda 
1/4 tsp table salt 
1 pinch of nutmeg
1/2 c.  light brown sugar, packed 
1/2 c. buttermilk 
1 large egg 
4 tblsp unsalted butter, melted until just browned 

1 tsp vanilla extract

Directions:
1. In a medium bowl, whisk together flour, cocoa powder, baking soda, salt, nutmeg and brown sugar and set aside.
2. Melt butter in a small saucepan.
3. In a separate bowl, whisk together buttermilk, egg, melted butter, and vanilla extract.
4. Pour the wet ingredients into the dry ingredient bowl , folding all ingredients together with a spatula until well combined.   
5. Transfer batter into a pastry bag or zip lock bag with a corner snipped off and pipe batter into the wells of a buttered mini donut pan.  Fill no more than 2/3 of the way.  (Trust, if you over batter you will have mini Bundt cakes instead of mini donuts!)
6. Bake in oven for aprox. 7minutes or until the donuts rise and are springy to touch. 
7. Let donuts cool a few minutes before transferring them to a wire rack to cool.

Tip:  In case you didn’t listen to me, and you over filled your donut pan too much and your mini donut/bundt cakes have no hole, use a toothpick or end of a small spoon to hollow one out.


Glaze
Adapted from SprinkleBakes.


Ingredients
2 c. powdered sugar, sifted
1 tsp.  vanilla
3-5 tablespoons whole milk
3-4 drops green food coloring 

Directions
1. Sift powdered sugar in a large bowl.
2. Make a well in the center  of the sugar with your finger.
3. Pour the vanilla extract, food coloring  and 1 tablespoon of milk into the well. 
4. Stir together with a whisk.
5. Add more milk, 1/2 a tablespoon at a time, as needed.  The glaze should come together, shiny and smooth with no clumps.  Don't add too much milk.  I used about 3.5 table spoons total, but this will vary for you.   
6.  Add additional food coloring if needed.  (Use gel food coloring if possible, I used Winton's "Leaf Green".)
7. Dip the tops of your donuts into the glaze, making sure to coat the top completely.  If the donut hole is covered or clogged, poke through with a spoon.
8.  Set donut on a rack to set the icing.  
9. When you are done dipping all your donuts, repeat the process one more time.  Two coats makes the icing more opaque and the color will look much better.  
10.  Add any sprinkles to the donuts while the donut glaze is still wet. 
11. Let donuts set completely, about 30 minutes. 


I have never used sprinkles so sparingly before!  I added a few very strategically placed white sprinkles and just one little shamrock.

Donut worry though,  I will be back to covering everything in sprinkles again next week.


Have a great St. Patrick's Day friends!  Eat plenty of carbs, drink responsibly, wear green and always, always double dip your mini donuts.
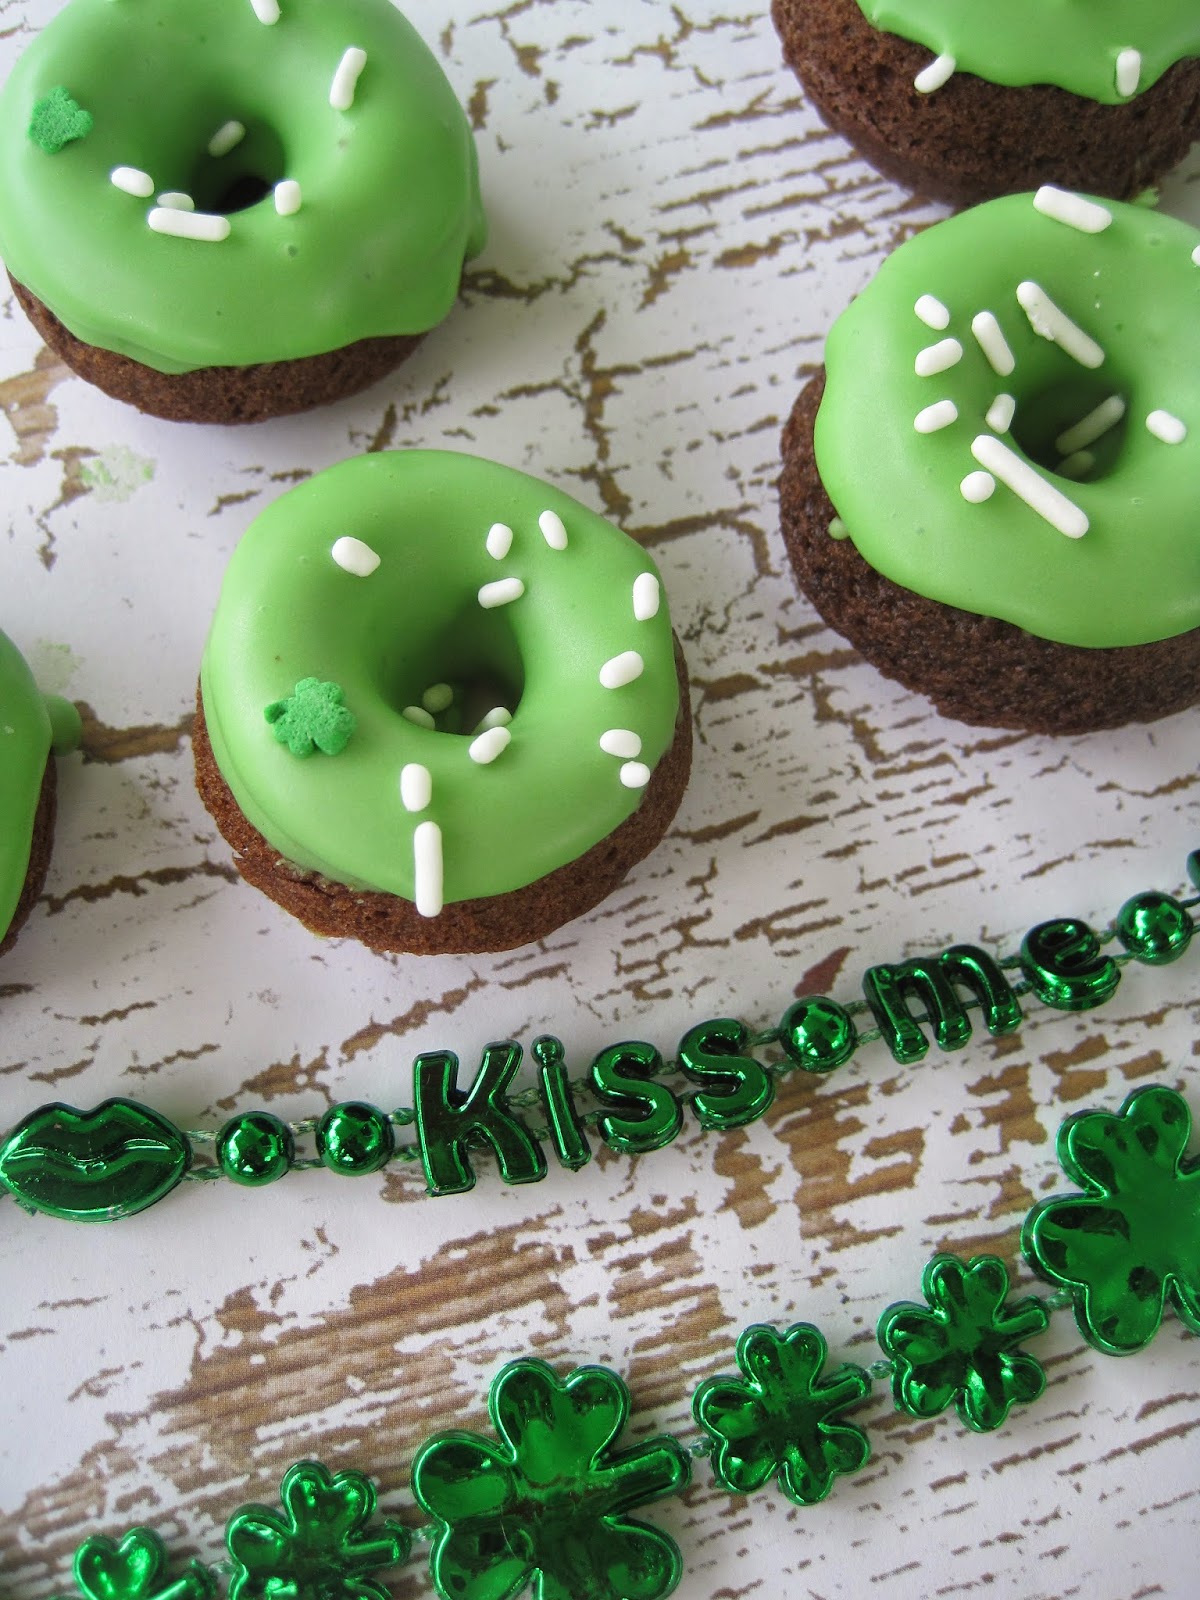


But make sure you get your fill of green things, shamrocks and Irish kisses.  'Cuz I am ready for some pastel bunnies up in here!

xoxo,
Anna


P.S. For more St. Patrick's Day inspired treats, check out my Lucky White Chocolate Chip Cookies or my  Wet Chocolate Irish Coffee Cupcakes .


Monday, March 17, 2014

Lucky Chocolate White Chocolate Chip Cookies


Happy St. Patrick's Day!  My mind was on green clovers all weekend long, so I am obviously wearing a pretty green dress today.  No getting pinched here.

I have been trying to get my hands on General Mill's Special Edition of Lucky Charms with only green clovers since last year. They only come out once a year!  And I completely struck out last year so upon fearing the same fate this year, I sent a message to Lucky Charms directly to ask what store I could find them in.  And they answered me!  But even cooler yet, they mailed me a box of Lucky Charms goodies.  Yay swag!  Bet you can't wait to see me in my Lucky Charms shirt.


I set to work on Saturday morning, sorting out the bright green clover marshmallows.

And eating cereal too... there was some of that.


And then I stuck them in some chocolate cookies. And then took them on a hike on Sunday.  8 miles means all the cookies you can eat, right?


Lucky Chocolate White Chocolate Chip Cookies
Makes 30, bake at 350* for 8-10 minutes

1 cup butter
1 1/2 cups granulated sugar
2 eggs
2 tsp vanilla
2 cups flour
2/3 cups cocoa powder
3/4  tsp baking powder
1/4 tsp salt
1 3/4 cup white chocolate chips
1/2 cup green clover marshmallows
1/3 cup green clover marshmallows reserved

Directions:
1. Cream butter and sugar together in a stand mixer fitted with a paddle attachment.  Beat on medium until light and fluffy.
2. Add in eggs, one by one and scrape down the side of the bowl if necessary. Add vanilla.
3. In a separate bowl, combine flour,  cocoa powder, baking powder and salt.  (Whisk together by hand to fully combine ingredients.)
4. Add flour mixture to sugar mixture 1/2 cup at a time, with the mixer on low.  Stop mixer when fully incorporated.
5. Fold in white chocolate chips.
6. Hold in 1/2 cup green clovers.
7. Chill dough for at least 60 minutes in refrigerator.
8. With a medium cookie scoop, scoop out dough onto cookie tray lined with parchment paper.  
9. Add additional 2-4 green clovers on top of the dough before baking.
10. Bake for 8 - 10 minutes at 350*.  Cookies are done when tops are thoroughly baked, and no longer sticky when touched.
11. Remove from oven and let cool on wire rack.

These have been taste tested to be delicious.  By me.  You are welcome. They are super chocolatey, dense in flavor but really light in texture.  It's almost like biting into a brownie cookie!


One of the most amazing things about these cookies are the clover marshmallows.  In the cereal, like the regular Lucky Charms marshmallows, they are hard.  Once baked however, they puff up and turn into soft marshmallows!  So cute and yummy.


Enjoy the rest of your St. Patrick's Day!  Hopefully no one went too hard on the green beer this weekend and their morning is fairing well.  I went on that St. Patrick's Day hike on Sunday (green shamrock on the top of Mission peak!) and went way too hard on my knees so I'm not fairing terribly well.  But it's only Monday, and with any luck this gorgeous California weather we have been having will allow me to continue spending March wearing shorts, exploring the outdoors and eating half a pint of ice cream on my weekends.

xoxo,
Anna

Wednesday, August 1, 2012

Dinosaur Key Lime Pie Cupcakes


If you  look up "crazy"  you will clearly find that nowhere in the definition does it desribe a girl who sits at the kitchen table separating out the green dinosaurs from the rest of the purple, orange, and pink dinosaur sprinkles.  


Therefore, I am not crazy because I did that.  I just really wanted to use the green ones is all.  Okay?

Now why are there cute little green Wilton green dinosaur sprinkles on these cupcakes?  These, key lime cupcakes to be exact.  With a graham cracker crust, key lime cake, tart key lime curd topping and whipped cream frosting what else could they be? Well that's because my dear friend Katie had her annual themed birthday party.  This year's theme was Miami Vice Dinosaurs in Hawaii.  The Hawaii part will be covered in next week's post.  This week's covers the Miami part (key lime!) and the dinosaur part.  And yes, i made two kinds. And no, I will not be doing that again. Way too much cupcaking.

I adapted the recipe from here.

Key Lime Cupcakes 
Makes 16, Bake at 350* for about 18 minutes 

Crust3/4 c. graham cracker crumbs1/8 c. sugar1 tablespoon melted, unsalted butter Cupcakes1.5 c cake flour1/2 tbsp. baking powder1/4 tsp. salt1/2 cup unsalted butter, room temperature1 cups sugarZest of 2 key limes2 tablespoon fresh key lime juice3 large eggs,  room temperature1 cup buttermilk, room temperature1 tsp. vanilla extract Directions: For the crust - 1. Crush up graham crackers and melt butter.2. Combine graham cracker crumbs, sugar and melted butter and mix together.3. Scoop out 1 tablespoon of the graham cracker mix into the bottom of each cupcakes liner and press down. 5. Bake at 350% for 5 minutes.  6. Remove from oven and set aside.  For the cupcakes -1. In one bowl, whisk together the cake flour, baking powder and salt in a medium bowl. Set aside.2. Beat butter on medium speed in your stand mixer until light and fluffy  (3 minutes).  3. Beat in lime zest. 4. Beat in sugar, ¼ cup at a time.5. Beat in eggs, one at time.6. In a separate bowl, combine the buttermilk and vanilla.7. In 5 additions, add the flour mixture and the buttermilk mixture to the butter mixture in your stand mixer. Start and end with flour.   Beat until fully incorporated. 6. Scoop out batter on top of the graham cracker baked crust.7. Bake in oven, set aside to cool completely.  


They didn't come out exactly how I wanted truth be told.  I was initially going to core them and fill them with the lime curd, but they were a little... concaved?  This actually ended up working perfect though.  You will see in a second.  I DID like how you could see the little pieces of zest though! 

Key Lime Curd

4 eggs
1 c. sugar
2 tbl spoons key lime zest 1/3 c. fresh key lime juice1/2 c. (1 stick) cold unsalted butter, cut into pieces 


Directions:1. Put a heat proof glass bowl over saucepan filled with 2 inches of water.
2. Whisk together zest, juice, sugar and eggs over low-medium heat. 3. Stir constantly with spoon for approximately 10 minutes.  It took mine almost 15 because I had the heat pretty low. Stop stirring when the mixture can coat the back of your spoon.4. Remove from heat and mix in cubed butter until smooth.5. Use a seive to remove pieces of zest and any cooked egg.6. Cover with plastic wrap (directly over the mixture) and refrigerate. 

The mixture will thicken up within a few hours.  You can make this ahead of time and keep in the fridge for up to a week.
I used the same technique and basic recipe as I did for the lemon curd for my blueberry lemon curd filled cupcakes.  The lime is much much more tart though.  I have tons left over, actually.  Need a scone!


But for the cupcakes, I actually just ended up putting the curd directly over the cupcake.  Not filled, just on top. The concave tops worked perfect for this. 


And on top of the lime curd, you put the frosting!

Whipped Cream Frosting


1 1/4 cup heavy cream
1 teaspoon vanilla
6 tablespoons powdered sugar

Directions:
1. Chill your paddle attachment and your bowl in the freezer.  Totally dig how it always looks so frosty!


2. Combine all ingredients in the mixing bowl and beat on high for five to seven minutes until cream can form stiff peaks.

Now, just pipe (I used a Wilton 2M tip for these) the frosting on top of the lime curd topped cupcakes.


Almost done!  Then garnish as you please.  If at all.  You can do lime zest but I wanted to put those dinosaur sprinkles to good use!  


I love the look of the lime curd poking out.  My only real grievance with them was that the curd was yellow and not green, haha.  And that's a pretty lame complain.

I started to do some orange dinosaurs too, but for the party only used the green ones.  It was more Key Lime-y in my opinion.


And as you can see, I also got to use my stands for the first time!  Not bad, eh?  I forgot to take picture of what they looked like on the inside though.  :(  Sorry.  I was too busy drinking Jungle Juice.  


These are just 1 of 2.  Next week you'll get to see the full display as well as the Hawaiian themed cupcakes.  I'm so proud of those!  

xoxo,
Anna 


Monday, June 4, 2012

Mint Chocolate Chip Cupcakes.. in Waffle Bowls!


THESE TASTE LIKE MINT CHOCOLATE CHIP ICE CREAM.

*Deep Breath.  Okay.

Wanted to get that out of the way right off the bat.

Also, I think it's safe to say that you want me at your summer bbqs.  (My schedule is filling up fast, however, so book early.)  These little babies are what I whipped up for one I attended on Sunday evening.

I don't remember how I decided on mint chocolate chip as a flavor.  Maybe because it was super warm last week  (high 80s) and refreshing and light things like mint sounded good.  But as soon as it was chosen, it was quite obvious that the theme would have be ice cream like as well.  And I dont just mean using an ice cream scooper to fill the liners.


 I spent a week bouncing ideas off of Pam, debating between cups or cones of waffle cones. (Thank you!!!)   I was resistant to it at first, but in the end necessity and time convinced me that I had to go with waffle bowls.  


And little wooden spoons. And fresh sprigs of mint (that I bought at Safeway only to find out later that I have oodles of mint growing in my own backyard.  Spanish Lesson for the day: Yerba Buena means is Spanish for mint.  This whole time I never knew! I just thought we had some weird fresh herb in the yards.  Oops.)


I used a new chocolate recipe for the cupcakes.  I am still in search of my Holy Grail chocolate cupcakes.  Does anyone have any recommendations?  Because the one that I used was by David Lebovitz, and it was good... but not UH-MAZING.  I strive for UH-MAZING afterall.

Chocolate Cupcakes
Makes 18, Bake for 15 minutes at 350*

9 tablespoons cocoa powder
1 1/2 cups cake flour
1/2 tsp salt
1 tsp baking soda
1/4 tsp baking powder
1 stick butter, room temp
1 1/2 cups sugar
2 eggs, room temp
1/2 cup cooled, strongly brewed coffee
1/2 cup low fat milk

Directions:
1. In one bowl, sift together cocoa powder, cake flour, salt, baking soda and baking powder and set aside.
2. In a cup, mix milk and coffee and set aside.
3. In mixer, cream butter and sugar together.  Add in vanilla.  Add in eggs one at a time.
4. Add flour and milk mixture in additions to mixer, beginning and ending with flour.
5. Scoop into cupcake liners and bake.  Let cool before frosting.

Truth be told though, I was a little terrified going into this one because the thought of using peppermint extract in something was pretty scary.  The chance for failure was high.  Every recipe that I read said to use peppermint but that makes me think of peppermint bark.. or even those York peppermint patties, neither of which I like.

A better blogger than I would look up the differences between peppermint and mint and why these came out awesome anyways.  Yeah.  I'll be a better blogger one day.  Today, we'll call is magic.

I looked up a good five recipes before deciding on not using any of them.  It's supposed to be ice cream like.  We needed some cream cheese up in there!

Mint Chocolate Chip Frosting

1 1/2 sticks butter, room temp
1/4 brick of full fat cream cheese
1/4 teaspoon salt
1/2 teaspoon vanilla extract
3/4 teaspoons peppermint extract
2.5* cups of powdered sugar
4 oz bar of dark chocolate (60% cocoa works good)
Itty bit of green food gel coloring

Directions:
1. Cream butter and cream cheese together until fluffy in stand mixer.
2. Add in powdered sugar.  *Feel free to use more powdered sugar, you probably should anyways, it will come out about the same and be firmer.  I just hate too much sugar.  I'd rather fatten people up with butter than sugar.)
3. Add in extracts, slowly.
4. Add food coloring, if desired.  I put about 5 SMALL drops of coloring in with the head of a toothpick.  I wanted a light color, and you probably do too so go easy.
5. Chop up your chocolate bar.  Don't feel like you need to put it all in, I ended using about 3/4 of it.  Make  big chunks. I use Ghirardelli because I am a Ghirardelli fan girl.  No shame in it.


6. Gently fold the chunks into the frosting.  My tip to you is to not just dump all the chocolate in there off of your cutting board.  When you chop it off, there are tiny little "crumbs" and shavings everywhere and this can dirty the frosting up.  Instead use the bigger chunks/pieces. 


This is where the fun part comes in.  Putting it all together!

I got some of the cupcakes naked (no liner) and put them inside waffle bowls.  They fit perfectly!


Then I took a small cookie scoop and filled it with frosting.  (DOESN'T IT LOOK LIKE ICE CREAM ALREADY???  At this point I am pretty sure I was actually giddy.)


I tried using a big ice cream scoop but that proved to be way too  much frosting for a cupcake.  I used a medium cookie scoop to "frost" the cupcakes.  But if you like that kind of thing, double (or even triple) the recipe and go for it!  And let me tell you, frosting with a scoop is so much more fun than with a piping bag, haha.

Then just add a little bit of mint for garnish and stick a spoon in it (I found my little wooden spoons at JoAnn's for 3.99)  and you are done.


Again, I made just a few with waffle bowls but I don't think that anyone ate the leftover bowl.  Everyone did use their spoons though!  It was cute, lol. And unnecessary but made me happy I found the spoons.   I made a lot with just white liners too.  Or if you can find them, you can also put them in little ice cream cups! And maybe drizzle them with ganache? Mint ganache.  I had toyed with the idea of doing so, but I ran out of time because my best friend held me up an hour away while he plowed himself with bottomless mimosas, lol.  Next time!


Best part was that even though it's a lot of chocolate, they still remained light and refreshing.  This only make me hopeful for the few other things I have in my head.  Hopefully you'll see those soon, too.  For now let's just be happy I finally posted something that was not a cookie...

xoxo,
Anna


Sunday, July 4, 2010

Android Robot Cupcakes

I'm a fan of Google's mobile phone OS, Android. I'm an even bigger fan of their cute little green alien robot mascot. I was going to bake some plain sympathy cupcakes but decided i might as well try something fun. And so i made my best attempt at a yummy edible green robot of my own.


Before i go into the details though, can i just say how much fun neon green cupcakes are? I didn't even want to frost them! They were so pretty.


I wasn't sure how i was going to make it's appendages, or how really lol. So I went to Walgreens and bought five dollars worth of green candy. I am quite frankly surprised that i didn't eat more of it then i did though. Here's a look into how i work though. On my mom's dining room table with holidays decor from both Christmas and Valentines Day. And crap eeeeeverywhere, ha.


Anyways, they turned out to be quite simple. Green tropical Mike and Ike's for the hands - secured with toothpicks. Green Apple Sour Punch Straws for antennae. The eyes were white Wilton Candy Melts, shaped into little eyes. I added green and yellow food coloring to both the batter, which was lemon and the frosting, which was vanilla.


Okay enough talk. More robots!


It was an army! haha.


xoxo,
Anna

Edit: UPDATE: This is the Android mascot for comparison - in case you live under a rock =p. Their version 1.5 was called Andriod Cupcake. I found this about a month and half after i made them. They kinda look alike don't they???