Showing posts with label vanilla. Show all posts
Tuesday, June 10, 2014
Puff Pastries: Inspired by miette
Hey guys, I lied a little. Well no, I lied a lot. Instead of properly preparing for Colombia by only eating lettuce and dustballs for the last three weeks, I have been eating big ol' burgers and lots of fancy artisan ice cream instead. It's hot and ice cream is good okay? Can ice cream be my spirit animal? Is that possible? Or just weird? Oh it's definitely weird... okay, I was just kidding anyway.
This last minute treat was completely justified though. It was a baking date with the fair Rachelle and it allowed me to get some quality time in (with her and a toy I hadn't played with before) AND have something to blog out! Win-win. She emailed me, suggesting eclairs and it only made sense to proceed with our endeavour since we had both bookmarked a recipe in our miette cook books ages ago. I first went to miette about two years ago and fell in love with their colors and decor, the whole shop and of course... the pastries! We each have our own copies. They both came in handy.
I was reminded of a very important life lesson on our date. You can't always be perfect. And that's okay because chocolate ganache and sprinkles can, in fact, fix most anything.
This applies to broken hearts (obviously) or puff pastries. But today I am talking about the latter. Neither of us had made puff pastries before. We certainly did not excel at our task. We did quite a few things wrong, actually.
Our biggest mistake was assuming that we knew better than our cook book. We were directed to pipe the puff pastry into 5x1 inch strips using a 1/2 inch diameter piping tip. We used math and convinced ourselves that they must have meant TWO strips. Two strips of dough would bake itself together, right?
Wrong. As evidenced above, we ended up with really big donuts... that could be divided into two. Like one of those popsicles from childhood. I get strawberry, you get orange but we break them in half and share! Not much of a pretty sight to see.
And piping into them was much of a disaster since they didn't fluff up properly and we had to fill them in at least two places! Pastry cream all over the place! At least I got to use my cool little machine though...
Yet we had a great time laughing over our mistakes and then trying our best to fix them. This is where we were saved by chocolate and sprinkles, the real heroes of today's story.
We zig zagged the ganache instead of dunking them. (Bonus: You can see the vanilla bean specks!)
We added some straight-from-miette sugar flowers to the prettiest ones. ... and ta-dah.
We had eclairs!
We had cream puffs!
Sure there's a few flaws in them but thats okay! At the very least TWO of them looked and photographed wonderfully,right? ;) Plus they were delicious. Just like an eclaire should taste like. And we had an awesome afternoon. We didn't let puff pastries defeat us!
I am quite confident that for our next date, Rach and I will master our technique and I will bring something even prettier to share!
xoxo,
Anna
(For the recipe, I encourage you to buy the miette book and follow the directions properly. I don't like to post exact recipes from books, nor will I post recipes when I don't think I have the recipe down enough. Soon though, soon!)
Monday, May 21, 2012
Classic Vanilla Madeleines
Madeleines are probably in my top three favorite cookies of all time. Ever. I discovered them at Starbucks while cutting P.E. class during high school and have been in love ever since.
This is the second round of plain vanilla madeleines I have made. This recipe calls for a lot of butter. A lot. Haha. That's what makes cookies so good after all, right? Lots of melted butter. A stick and a half to be exact.
Madeleines had always seemed so hard to make that it took me years to build up the courage to make them but I finally caved a few weeks/months ago and bought a pan. The pan forced me to make them and now I admit they are so easy to make it is ridiculous. (Does this mean I should move on and try the ever-daunting macaroons???)
Recipe taken from here.
Vanilla Madeleines
Makes around 30 full sized madelines. Bake at 350* for about 8-10 minutes.
1 1/2 sticks (3/4 c.) unsalted butter, melted and cooled, plus additional for brushing molds
1 1/4 c. sifted cake flour
1/2 tsp. baking powder
1/4 tsp. salt
3 large eggs
1 tsp. vanilla
2/3 c granulated sugar
(Optional: confectioners sugar for dusting)
Directions:
1. Melt butter in microwaveable bowl and set aside to cool. Brush on additional mixture onto madeline pans. (You literally brush it into the little crevices so that the cookies don't stick to the pan.)
2. Sift flour, baking powder and salt.
3. In mixer, beat eggs on high until foamy, add in vanilla. Add in sugar and beat until mixture triples in volume.
4. Fold in flour to sugar/egg mixture, slowly and in additions until combined.
5. Fold butter in.
6. Fill madeline pans with batter and bake.
I know I love to talk about ziplock bags a alot, but seriously I cannot stress how awesome they are. Have you tried this yet?
Spoon in the batter (or icing if you are frosting) into the bag... but put the bag in a tall cup first. This prevents you from getting batter all over your hands. I am an expert at that, by the way.
Then just gently but quickly squeeze the batter into the molds.
Nothing is more exciting than seeing a tray full of cookies just begging to be baked into something good.
I think they taste better the second or third day. So make a lot, because they just get better with age. :) I made these for Mother's Day, actually. I have a tendency to bake my mom things (read as cupcakes) for her birthday and have her not like them... so i decided to go with Madeleines because she had liked a previous batch I had made. Apparently my sweet tooth is not genetic because the reason she likes these so much is because they are not too sweet. Strange, I know.
These are obviously, just plain vanilla ones. Generously sprinkled with powdered sugar of course.
I tried strawberry ones but I need to make some tweaks before I post them on the blog. I also have a few more ideas for next month -- I am preparing some sweet treats for our annual tail gating party. You'll see some orange and black on here soon. ;)
xoxo,
Anna
Labels:
cookies,
french,
i baked this,
madeleines,
madelines,
vanilla
Sunday, July 17, 2011
Orange Creamsicle Cupcakes
I got new toys! The first and the one i was most excited over was the cupcake corer. :) I bought it especially to make these cupcakes because i decided on being adventurous and fill them with a different kind of frosting then the top. The second was a zester!
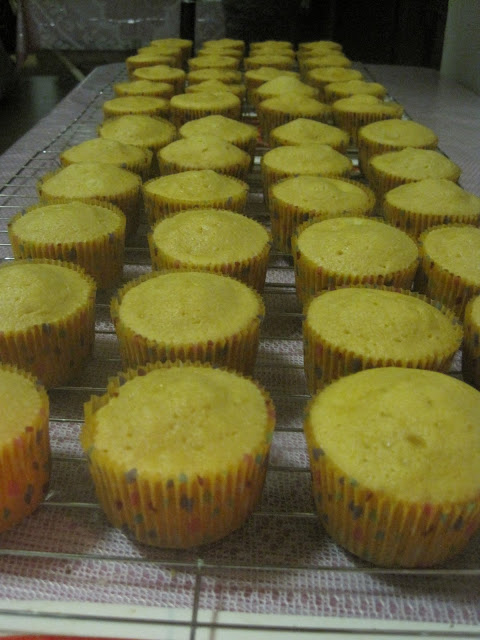
I combined a million recipes to come up with one that actually sounded yummy and crossed my fingers and hoped for the best. I just wanted a cupcake that tasted like a creamsicle. And i'm pretty sure that i accomplished that with these!
They are orange/vanilla cake with a marshmallow middle frosting and a orange cream cheese frosting on top. It's like summer. In your mouth.
The recipe for the cake portion i took from here. Except i ended up adding one thing at the end.
Orange Vanilla Cupcakes
Makes 24, bake 15 minutes, Bake at 350*
1 1⁄2 sticks (3⁄4 cup) unsalted butter, softened
1 1⁄2 cups sugar
2 tsp baking powder
2 tsp vanilla extract
4 large eggs
2 1⁄4 cups all-purpose flour
1/2 cup milk
1⁄2 cup orange juice
2 tsp grated orange zest
1 teaspoon orange extract
(optional: orange gel food coloring)
1. Beat butter, sugar, baking powder, vanilla, orange extract, orange juice and zest in a large bowl with mixer on high 3 minutes or until fluffy. (Optional: Add orange food coloring.)
2. Add eggs, 1 at a time, beating well after each.
3. On low speed, beat in flour in 3 additions alternately with milk in 2 additions, just until blended, scraping sides of bowl as needed.
This was when i got to play with the zester. Actually i had to youtube how to use a zester. But don't tell anyone. I felt bad for the naked orange afterwards, though.
This recipe says to bake for 22 minutes. But they came out perfect for me at 15 minutes. I actually tinted the batter with orange frosting just a little. The natural color is a light orange, almost yellow. I added just enough to give it a pale orange color instead.
These were for a party. So i had to do this twice... The second time is when i added the extra orange extract. It changed the flavor slightly, but most importantly it made them SMELL SO GOOD. I ate one still hot. Don't judge.
I actually baked these Friday night and finished at midnight, so i had to finish them the next day. My mom complained that i have invaded her kitchen so i cored and frosted them before the party house instead. I also go to have worker bees help me for once. =p I got all the cupcakes cored and ready for frosting in no time. It's the perfect little hole!
We also kept the middle in a bowl for people to snack on. Drunk people will eat anything.
The middles were filled with a marshmallow frosting so easy to make it's ridiculous. Adapted from here.
Marshmallow Frosting
(Enough to frsot the tops of 24 regular cupcakes, or enough to fill 48 cupcakes)
1 8 0z Marshmallow jar
2 sticks butter
2 cups powdered sugar
It took all of 4 minutes to frost the centers. No lie. Just shoved the frosting in a bag and cut off the tip.

Then i got to make the frosting for the top. I actually made the same frosting twice, and used one in it's natural white color while i tinted the other frosting orange.
I hate butter cream! One day i will mess around until i find one i like, until then i am making cream cheese frosting. I have not had any complaints yet...
Orange Cream Cheese Frosting
Makes enough for generously frosting 24 cupcakes
1 stick butter
1 8oz cream cheese package
3 cups powdered sugar
2 teaspoons orange extract
(Optional: orange gel food coloring)
Why did i make two? Because i wanted them to be swirly! >.< It's more adorable that way, trust me. So i shoveled a zip lock with 1/2 orange and 1/2 white frosting and set to work. (Put the frosting on each side of the bag so that the tip (Wilton 1M) squeezes out both at the same time. It's tricky but it works!)
Since there were helpers in the kitchen, you can actually see me doing something for real this time =p
You can see that piped out, the frosting comes out in two colors! Cool huh? Kind of looks like those soft serve machines.
Once i was done with all 48, i set them up on my trusty cupcake display. But first i had to add a few finishing touches. They're popsicles right? They needed a popsicle stick through them! I also threw some candy oranges around the table.
And if you cut them down the middle you get to see how awesome filled cupcakes look on the inside!
I wish i had saved one now though. Cuz all these pictures made me hungry... do you guys want one too?
xoxo,
Anna
Labels:
creamsicle,
cupcake corer,
cupcakes,
i baked this,
orange,
recipes,
vanilla,
zest
Subscribe to:
Posts (Atom)