Showing posts with label holidays. Show all posts

Monday, March 16, 2015

St. Patrick's Day Chocolate Mini Donuts


My friends' annual St. Patrick's Day Dinner was held last Saturday, March 14th, which was also Pie Day.  So while most of the baking bloggers out there were furiously making, eating and Instagramming pie,  I was in my kitchen making donuts.  I was just not ready to have Pie Day trump St. Patty's Day.  Or have pies trump donuts.  Or maybe i'm just a donut loving rebel like that.

Correction; a bright green, sprinkle topped, baked - not fried - chocolate mini donut loving rebel.

They're super easy to make.  Super delicious to eat.  And the only special equipment you need for these bad boys is a mini donut pan.  So it really is worth the cost, trust me.

And making mini (as opposed to normal-sized) donuts means you can guiltlessly eat half a dozen of them because they're just so itty bitty!  You better eat them fast, too.  Because they will disappear.


Mini Chocolate Donuts
Makes aprox 30 donuts.   Bake for 7 minutes at 325*
Adapted from Joy the Baker.

Ingredients:
1 c. flour 
1/4 c.  unsweetened cocoa powder 
1/2 tsp baking soda 
1/4 tsp table salt 
1 pinch of nutmeg
1/2 c.  light brown sugar, packed 
1/2 c. buttermilk 
1 large egg 
4 tblsp unsalted butter, melted until just browned 

1 tsp vanilla extract

Directions:
1. In a medium bowl, whisk together flour, cocoa powder, baking soda, salt, nutmeg and brown sugar and set aside.
2. Melt butter in a small saucepan.
3. In a separate bowl, whisk together buttermilk, egg, melted butter, and vanilla extract.
4. Pour the wet ingredients into the dry ingredient bowl , folding all ingredients together with a spatula until well combined.   
5. Transfer batter into a pastry bag or zip lock bag with a corner snipped off and pipe batter into the wells of a buttered mini donut pan.  Fill no more than 2/3 of the way.  (Trust, if you over batter you will have mini Bundt cakes instead of mini donuts!)
6. Bake in oven for aprox. 7minutes or until the donuts rise and are springy to touch. 
7. Let donuts cool a few minutes before transferring them to a wire rack to cool.

Tip:  In case you didn’t listen to me, and you over filled your donut pan too much and your mini donut/bundt cakes have no hole, use a toothpick or end of a small spoon to hollow one out.


Glaze
Adapted from SprinkleBakes.


Ingredients
2 c. powdered sugar, sifted
1 tsp.  vanilla
3-5 tablespoons whole milk
3-4 drops green food coloring 

Directions
1. Sift powdered sugar in a large bowl.
2. Make a well in the center  of the sugar with your finger.
3. Pour the vanilla extract, food coloring  and 1 tablespoon of milk into the well. 
4. Stir together with a whisk.
5. Add more milk, 1/2 a tablespoon at a time, as needed.  The glaze should come together, shiny and smooth with no clumps.  Don't add too much milk.  I used about 3.5 table spoons total, but this will vary for you.   
6.  Add additional food coloring if needed.  (Use gel food coloring if possible, I used Winton's "Leaf Green".)
7. Dip the tops of your donuts into the glaze, making sure to coat the top completely.  If the donut hole is covered or clogged, poke through with a spoon.
8.  Set donut on a rack to set the icing.  
9. When you are done dipping all your donuts, repeat the process one more time.  Two coats makes the icing more opaque and the color will look much better.  
10.  Add any sprinkles to the donuts while the donut glaze is still wet. 
11. Let donuts set completely, about 30 minutes. 


I have never used sprinkles so sparingly before!  I added a few very strategically placed white sprinkles and just one little shamrock.

Donut worry though,  I will be back to covering everything in sprinkles again next week.


Have a great St. Patrick's Day friends!  Eat plenty of carbs, drink responsibly, wear green and always, always double dip your mini donuts.
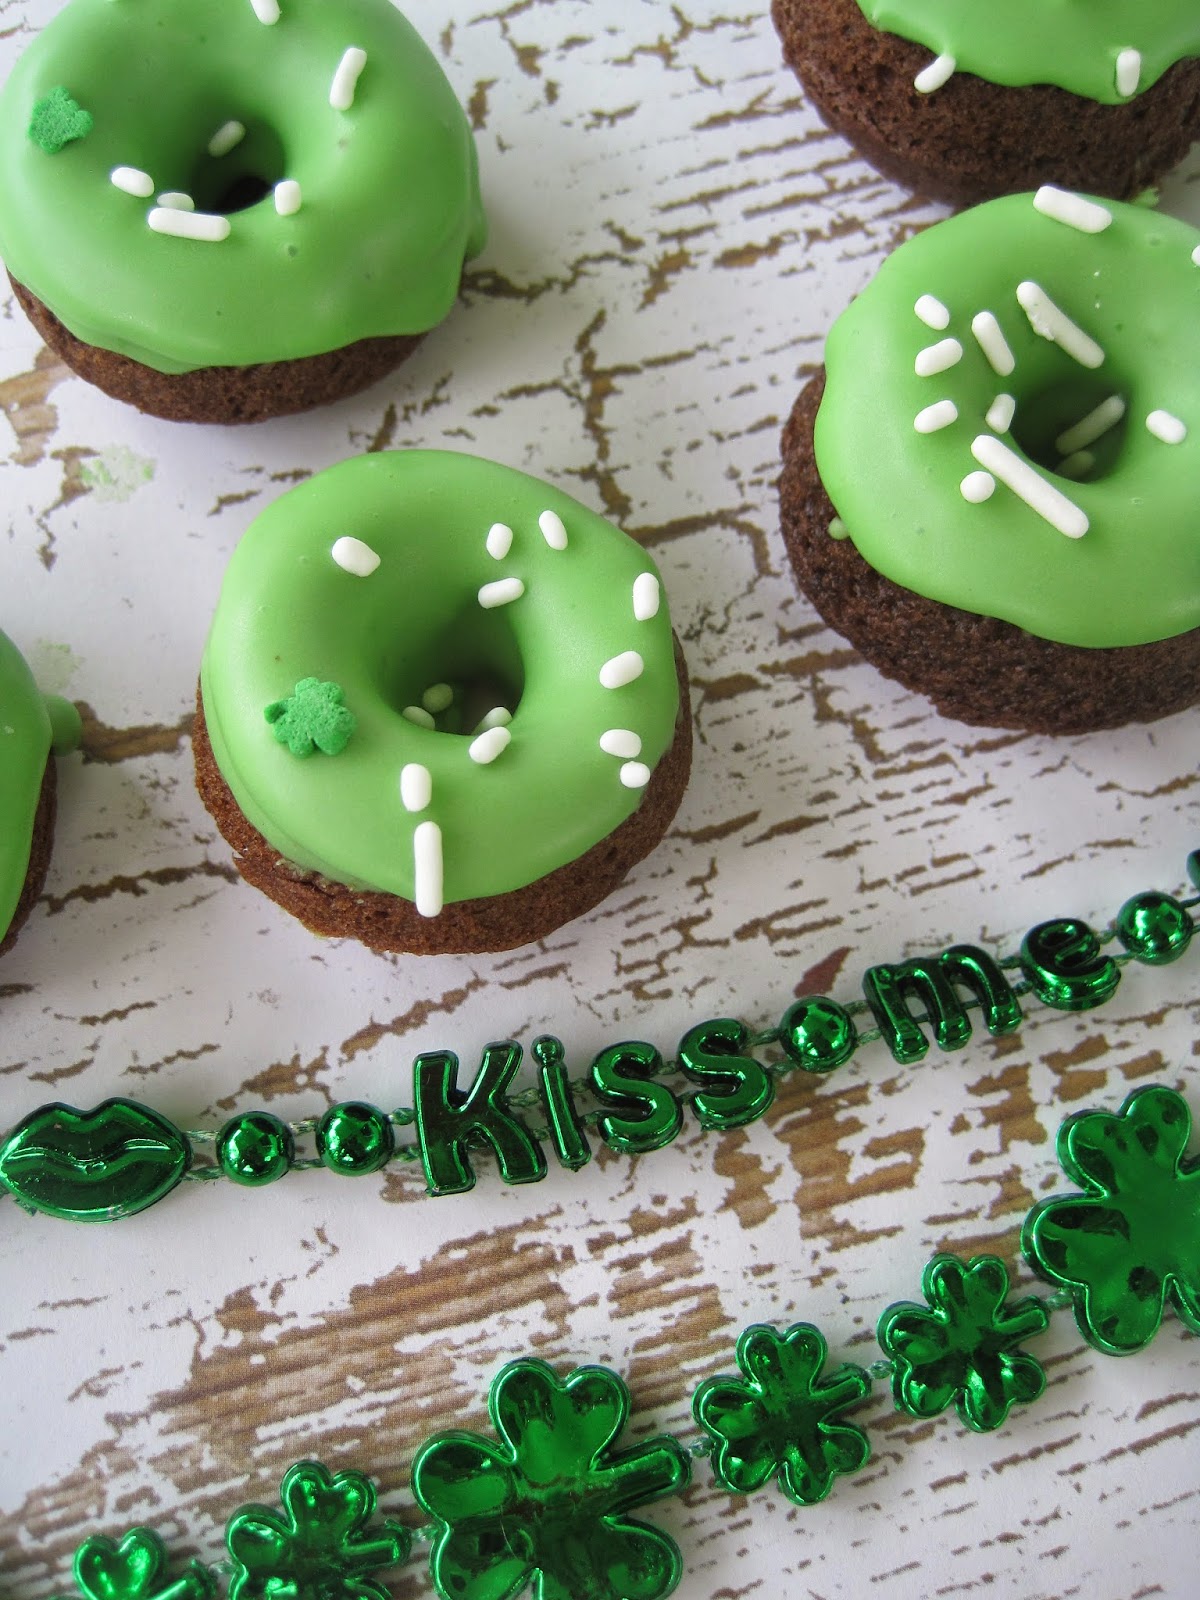


But make sure you get your fill of green things, shamrocks and Irish kisses.  'Cuz I am ready for some pastel bunnies up in here!

xoxo,
Anna


P.S. For more St. Patrick's Day inspired treats, check out my Lucky White Chocolate Chip Cookies or my  Wet Chocolate Irish Coffee Cupcakes .


Monday, December 8, 2014

Rudolph the Reindeer Cookies


I have not decided if I love the holidays because of the family, friends and food that joyously fill the season  OR if I just really like reindeer antlers. =D  On my baked goods.  On my socks.  On my head.

Last year I made gingerbread latte cupcakes in a jar to match the antlers on my head for my good friend's Holiday party.  Naturally, since I re-wore the same antlers to this year's party, I had to find another treat that would look great with antlers.  And big red noses.

These Rudolph cookies take a little time to put together, but they aren't difficult to make.  With some free time and a helper Christmas elf or two you may want to try them this year for yourself to liven up your own holiday parties.


Reindeer Gingerbread Cookies
Makes 30 2-inch cookies.  

Ingredients/Supplies
Your favorite gingerbread roll out cookie dough recipe*
2-inch round cookie cutter
1 bag white Candy Melts
1 bag light brown Candy Melts
Various sprinkles;  I used silver sprinkles, pearls, white snowflakes and pink hearts
Wilton eye candies
Red candy (M&M's, jelly beans, etc)

*I used this one from The Decorated Cookie. The only difference is that I needed to add a lot more flour once I started rolling out the dough.

Directions/Assembly:
1.  Prepare dough as directed.  Cut out faces using a 2-inch round cookie cutter.  Bake and set out to cool.
2.  Melt white Candy Melts in microwave and pipe antlers onto wax paper.  I did this freehand, but you can find a stencil on the internet as well.
3.  Place various sprinkles onto antlers while they are still wet. Silver sprinkles look like snow!
4. Let dry. You can speed up this process in a freezer.
5.  Once cookies are completely cool, melt brown Candy Melts and using a small spatula or butter knife to spread a thick coat over cookies.
6. While the candy melt is still wet, press antlers to top of cookies. Hold in place a few seconds.
7. Press Wilton eye candies below antlers.
8. Press red candy under the eyes. (or brown/black candy if you want regular reindeer instead of Rudolphs)
9.  Let cookies dry for 15 minutes before moving.

You can use all kinds of sprinkles for these cookies. And if you use an edible pen you can change the look of the eyes as well.  Add the slighlty different shaped noses and antlers and they can take on so many different personalities!

I added little hearts to some of the antlers because who said that Rudolph couldn't have secretly been a girl???


I also tried making some "regular reindeer".  Instead of a red candy nose, I used a large upside down chocolate chip.


They were still cute, but c'mon.  We know what we want during the holidays.  THAT RED NOSE.


I also used these cookies the following day for Rachelle's annual holiday cookie exchange.  I couldn't bake two separate  yummies in one weekend... there are not enough hours in the day, I am not Beyonce.

I hope everyone's holidays have started off as wonderful as mine.  I am knee deep in gingerbread lattes and cookies, burlap tree skirts and woodland creatures and we are only half way into December.  Can't wait for the rest of it!  There's still deep fried turduckens to eat, tamales to make, and Christmas Cheer to spread.

xoxo,

Anna

P.S. Oh, and just so you guys know.  I think it's time to retire the antlers.  I have gotten much good use from them the last two years.  What's next?  Elf ears?  How can I dress up like a penguin?  Anyone know?


Wednesday, January 23, 2013

Chocolate & Coconut Dipped Shortbread Cookie Hearts


You are going to see a lot of cookies in the coming weeks.  And a lot of dark chocolate.  But that's all perfectly acceptable because those two things are much better than green smoothies made with kale and pencil shavings.  Promise you there will be none of those recipes here.  Exclusive buttery goodness.

And oh yes, these shortbread cookies are full of buttery goodness. And dark chocolate.  And toasted coconut flakes. And since I used heart shaped cookie cutters they are full of LOVE too.

I used SprinkleBakes's recipe for the shortbread because I kind of love her.  It's like she's with me in the kitchen!


 And I am glad I did.  I am still working out the kinks of rolling out dough, and had some trouble but it had nothing to do with the recipe and all to do with me running out to order pizza and refrigerating the dough for too long.  So just don't do that all you're all set. I was also making these at a friend's, so unfortunately I had some trouble with the oven as well, so they were browned more than I'd like.  Hopefully my next batch  (next week) will come out prettier.  But taste wise?  The shortbread was perfect.  Like a fine wine, they get better with age.  I would prepare these 2-3 days before you serve them.

Shortbread Cookies
Made aprox. 20 3-inch cookie hearts.
Bake for about 12 minutes at 350*

2 cups (4 sticks) non salted butter, softened
1/4 cup granulated sugar
1 cup confectioners/powdered sugar
1 tsp vanilla
4 cups flour
1 pinch of salt

Directions:
1. In a stand mixer, beat butter and sugar together until fluffy.
2. Add in the confectioners sugar, beating just until incorporated completely.
3. Add vanilla.
4. Add 2 cups of flour and mix on low until a dough forms.  Add additional 2 cups and continue mixing on low until a very stiff dough forms.
5. On a floured surface, separate dough into two equal sections and roll each piece with a floured rolling pin until dough is about 1 inch thick  Wrap well in plastic and refrigerate for 30 minutes.
6. While still cold, but pliable, roll our further until 1/4 inch in thickness.
7. Use cookie cutters in whatever shape you'd like.  Dough can be rolled out one more time.
8. Bake in oven until edges are slightly brown.  Set aside to cool on a wire rack.

Remember that any cookie cutter is fine to use with these.  Someone do a chocolate dipped dinosaur!!!


As you can see, those are two different shaped hearts.  No heart is the same right? :)


Dark Chocolate Glaze
6 oz dark chocolate chips
1 tsp butter

Directions:
1. In microwave melt chocolate chips in 30 second intervals, stirring in between each round.  Should take about 2 minutes total.
2. In a separate bowl, microwave butter until fully melted and add to chocolate and whisk until smooth.
3. Use chocolate to dip cookies. Simply dip into the bowl and use a spatula to cover any missing parts.  Place on wire rack to drip.


Coconut Topping
2/3 cup shredded coconut


Directions:
1. On parchment paper on a baking sheet, toast shredded coconut for 4-8 minutes at 200*.  This can be done in a small toaster oven as well.
2. Sprinkle desired amount on top of chocolate covered cookies while chocolate has not set yet.
3. Let cookies harden, store in air tight container.  3-4 day old cookies are delicious.


These would be perfect for a Valentines Day treat.  Nothing says  "Please Be My Valentine" like cookies.

Well no I lie.


Maybe give them three cookies.  The more cookies, the better.

xoxo,
Anna

P.S.  Thanks to Katie who was my sous baker for these. Even though her husband laughed when I insisted she did a good job helping, she DID!  

Sunday, December 30, 2012

Rummy Oatmeal Raisin Cookies with Eggnog Icing


Hello everyone!  Hope everyone has had a happy holiday season so far! I've been quiet lately because of how busy I have been, not because I have not been baking.  I've been running around too much the last month and a half, destroying gingerbread men cookies, going to Christmas plays, playing dress up, drinking birthday hot chocolate, eating tamales I made myself, having tea with the girls, shooting bows, destroying more gingerbread men, drinking too much wine, really just enjoying this season.  

But I've baked ALL the cookies.  Lots and lots of cookies.  To give away in mugs for Christmas, to bring to events, to make for "the blog" but then eat them all myself with a cup of tea without even taking pictures of them first...  

Lucky for you I took pictures of these!  (Thank you rain for staying away today.)  Just in time for you to whip some up tomorrow for your New Year's Eve parties.   Or for because it's Monday.  Or Tuesday.  Or any day. Or have left over egg nog and rum in the fridge.  Which is why I made these earlier today.  They are all wrapped up, waiting for tomorrow's New Year's Eve bash.  


Actually, I wanted to make more oatmeal raisin cookies because believe it or not, they're my favorite cookies.  I finally found a recipe (and by found I mean I combined like 5 to make one that sounded good) that pleased me, but those cookies I made last week and are super long gone.  So i wanted more.  But I felt that i would need to add something more to make them appropriate for New Years -- it does signify the end of the holiday season after all. I was debating on maybe adding a glaze on top while looking in the fridge for brekkie this morning and I saw a carton of eggnog.  Lightbulb moment.  

The eggnog, by the way, was also next to the rum... so I soaked the raisins in rum while I ran my morning errands.  By the afternoon, these were baked, photographed, instagrammed, and packaged up. 


Rummy Oatmeal Raisin Cookies 
Makes 18, Bake at 350* for 10 minutes.

7/8 c. flour
1/4 tsp baking soda
1/4 tsp baking powder
1/4 tsp salt
1 tsp cinnamon
1/2 tsp nutmeg
1/2 c unsalted butter, room temp
1/2 c sugar
1/2 c brown sugar
1 egg
1 tsp vanilla
1 1/4 c oats
1/3 c rummy raisins (soak raisins in rum for 1-3 hours)

Directions:
1. In a bowl, whisk together flour, baking powder, baking soda, salt, cinnamon and nutmeg.
2. Cream butter and sugar together in a stand mixer.
3. Add in vanilla extract and egg and beat until fully incorporated.
4. Add in flour mixture to batter.
5. Fold in oats, and then raisins. (Note: the rummy raisins will make the dough a little wetter than most dough, refrigerate if you have the time.)
5. Scoop out dough balls onto parchment lined cookie sheets and bake until edges are brown.
6. Let set on cookie sheet for 1-3 minutes and then place on cooling rack.


Eggnog Glaze
1/4 c. eggnog
1 tbsp rum
1 tbsp melted butter
1 1/2 c. powdered sugar
1/8 tsp nutmeg

Directions:
1. In a small bowl, whisk together butter, rum and egg nog.
2. Add in powdered sugar and whisk until smooth. Can adjust the amount of sugar up or down, depending on taste and consistency.
3. Add in nutmeg.
4. Once cookies are completely cool, spoon onto top of cookies as desired and let icing harden completely before storing.


Or eating. Cuz now that you've made them you must certainly eat one.


The glaze really tastes like eggnog.  The raisins are extra plump and not dried out at all.


Yes, most of the alcohol in the raisins are baked out but they retain that light alcohol-y essence that we boozehouds love.


2012 has finally brought me some much needed sanity and a greater appreciation of life, true friendships and strangely even myself.  May 2013 bring beautiful things to this already very blessed girl, and to all of you as well.

Happy New Year.

xoxo,
Anna