Showing posts with label cookie exchange. Show all posts

Monday, December 8, 2014

Rudolph the Reindeer Cookies


I have not decided if I love the holidays because of the family, friends and food that joyously fill the season  OR if I just really like reindeer antlers. =D  On my baked goods.  On my socks.  On my head.

Last year I made gingerbread latte cupcakes in a jar to match the antlers on my head for my good friend's Holiday party.  Naturally, since I re-wore the same antlers to this year's party, I had to find another treat that would look great with antlers.  And big red noses.

These Rudolph cookies take a little time to put together, but they aren't difficult to make.  With some free time and a helper Christmas elf or two you may want to try them this year for yourself to liven up your own holiday parties.


Reindeer Gingerbread Cookies
Makes 30 2-inch cookies.  

Ingredients/Supplies
Your favorite gingerbread roll out cookie dough recipe*
2-inch round cookie cutter
1 bag white Candy Melts
1 bag light brown Candy Melts
Various sprinkles;  I used silver sprinkles, pearls, white snowflakes and pink hearts
Wilton eye candies
Red candy (M&M's, jelly beans, etc)

*I used this one from The Decorated Cookie. The only difference is that I needed to add a lot more flour once I started rolling out the dough.

Directions/Assembly:
1.  Prepare dough as directed.  Cut out faces using a 2-inch round cookie cutter.  Bake and set out to cool.
2.  Melt white Candy Melts in microwave and pipe antlers onto wax paper.  I did this freehand, but you can find a stencil on the internet as well.
3.  Place various sprinkles onto antlers while they are still wet. Silver sprinkles look like snow!
4. Let dry. You can speed up this process in a freezer.
5.  Once cookies are completely cool, melt brown Candy Melts and using a small spatula or butter knife to spread a thick coat over cookies.
6. While the candy melt is still wet, press antlers to top of cookies. Hold in place a few seconds.
7. Press Wilton eye candies below antlers.
8. Press red candy under the eyes. (or brown/black candy if you want regular reindeer instead of Rudolphs)
9.  Let cookies dry for 15 minutes before moving.

You can use all kinds of sprinkles for these cookies. And if you use an edible pen you can change the look of the eyes as well.  Add the slighlty different shaped noses and antlers and they can take on so many different personalities!

I added little hearts to some of the antlers because who said that Rudolph couldn't have secretly been a girl???


I also tried making some "regular reindeer".  Instead of a red candy nose, I used a large upside down chocolate chip.


They were still cute, but c'mon.  We know what we want during the holidays.  THAT RED NOSE.


I also used these cookies the following day for Rachelle's annual holiday cookie exchange.  I couldn't bake two separate  yummies in one weekend... there are not enough hours in the day, I am not Beyonce.

I hope everyone's holidays have started off as wonderful as mine.  I am knee deep in gingerbread lattes and cookies, burlap tree skirts and woodland creatures and we are only half way into December.  Can't wait for the rest of it!  There's still deep fried turduckens to eat, tamales to make, and Christmas Cheer to spread.

xoxo,

Anna

P.S. Oh, and just so you guys know.  I think it's time to retire the antlers.  I have gotten much good use from them the last two years.  What's next?  Elf ears?  How can I dress up like a penguin?  Anyone know?


Tuesday, May 20, 2014

Chocolate Covered Caramel Macaroons


Coconut macaroons!  The perfect spring cookies.  Except you know, I live in California and it's halfway into May which pretty much means it's summer.  Oops?

I wanted to make and post these in February.  I had really cute Valentines Day ideas for them.  And then Spring happened.  Which meant February, March and April was spent going on lovely hikes with the puppies,  baseball games(go giants!) and enjoying the pretty view the outdoors had to offer.  And then it was May, which meant more baseball, rodeos, and trying to steal red pandas from the zoo.

So yes, I definitely made them too late to be springy.  No problem.  Let's cover them in chocolate and caramel and they are perfect for any time of the year!!!


Chocolate Covered Caramel Macaroons
Makes 30, bake at 325* for aprox 14 minutes

4 egg whites
Dash cream of tartar
1/2 c. granulated sugar
1/4 tsp. salt
1/2 tsp. vanilla
20 oz (1.5 large bags)  sweetened, shredded coconut

1/2 c. dark chocolate, melted for decorating

Caramel Filling
1/2 lb (8 oz) caramel candies
2 tbs. heavy cream

Directions for Caramel Filling
1. Place unwrapped caramels and heavy cream in a microwave safe bowl.
2. Microwave on high for 1 minute and stir.  Continue to microwave in 30 second intervals, stirring each time.  Do not let caramels scorch.

Directions for Cookies:
1. In a stand mixer fitted with the whisk attachment, whisk egg whites, sugar and cream of tartar on high until stiff peaks form.
2. Add in salt and vanilla while mixer is still on, after peaks have formed and then immediately turn off.  Don't over beat your eggs.
3. Fold in coconut flakes into egg whites.
4. Using a medium cookie scoop, scoop dough and place on cookie sheet lined with parchment paper.
5. Using your thumb, make an indentation in each cookie ball.
6. Bake for about 14 minutes, or until the edges start to darken and the coconut no longer appears wet.
7. Remove from oven and let cool completely on a wire rack.
8. When completely cooled, fill indentation with 1/2 a tablespoon of caramel.
9. Drizzle melted chocolate (with a spoon or using a piping bag) over entire cookie.
10. Let chocolate and caramel dry a room temp for 1-3 hours and enjoy!


Now, I know I went a little crazy with covering these sweet coconut confections with more sweet things...  But you don't have to be as enthusiastic about sugar as I am.  You don't have to put caramel in them.  You are free to eat them plain.  Or covered in a lot of chocolate.  Or a little chocolate.  Make them your own. They taste delicious any way you make them.


But I suggest you make just a few with the caramel. Just because you want to take a bite of them now, don't you?


I will mostly likely be quiet the next few weeks.  Well, I HOPEFULLY will.   Mostly because I need to somehow find a way to get Shakira's abs in exactly 4 weeks. (Does anyone know how to do that, by the way?)  I am going to Colombia with the boyfriend in June (omg, so excited!!!) and i'm pretty sure positive that my baking is not even a little conducive to that goal...

Good thing you can make other sweet things in the oven.  Like oven-roasted plantains.  And I may try granola soon?  We'll see.   I won't stray too far though, and i'll be back soon enough.  Just wait 'till you see what I am cooking up for Pammy's bachelorette party favor!


xo,
Anna

Monday, April 28, 2014

Sprinkle Thumbprint Cookies with Tayberry Jam


There are so many of my favorite things in this post!  Sprinkles.  Cookies.  My kitchen mascots.  My new favorite jam.  My new favorite plate.  It's a lot to take in, I know.  Let's contain ourselves and start with the cookies.

The boy's  favorite cookies are thumbprint cookies, which I had shockingly never made before.  When he told me this, however I acted quite uninterested.  I filed it away in my brain, though.  I'd make them when the time was right, and when I found a way to make them special.

And then I was given a jar of tayberry jam from Inna Jam (based out of Emeryville, CA) and I immediately knew I had to make him his thumbprint cookies using this jam.  I did not know what a tayberry even was, but the second I tasted it I welcomed it's amazingness.  A tayberry is a cross between a raspberry and blackberry and the jam it produces begs you to spread it on a carb.  Toast. French toast. Pancakes. A donut. A cookie.  Any carb, all the carbs.

I have about half a jar left of the Tayberry jam.  I am trying my hardest not to eat it all and to save it for another baking project.  I can just fantasize how this would taste with dark chocolate...  Or in a jelly roll?  OMG.  I think I am just going to eat my little jar of jam on a really big pile of french toast this weekend and buy another 10 jars of these.  Problem solved. I digress though. Back to the cookies at hand.


When he left over Easter weekend, I grabbed my bunny rabbit spatula and set to work on these cookies for him.  Plus a few extra things.  I had been out of the kitchen for so long that I felt I owed my stand mixer some quality time.


Sprinkle Thumbprint Cookies with Tayberry Jam
Adapted from:  Food Network
Makes 20, bake at 350* for aprox 12 minutes.

1 1/2 sticks unsalted butter, room temp
1 c. sugar
1 egg, room temp
1 3/4 c. flour
1 tsp. vanilla
1/2 tsp. salt
1/2 tsp. baking powder
1-2 tablespoons of your favorite sprinkles
1/3 cup of your favorite jam

Directions:
1. Combine flour, salt and baking powder in a bowl.
2. On medium speed, cream butter and sugar together until fluffy in the bowl of a stand mixer fitted with the paddle attachment.
3. Add egg and vanilla to the sugar-butter mixture.
4. In 2-3 additions, add in flour mixture and mix until fully incorporated.
5. Add 1-2 tablespoons of sprinkles to dough, as desired, if at all.  (But who doesn't love sprinkles???)
6. Using a small cookie scoop, scoop dough and place on cookie sheet lined with parchment paper.
7. Using your thumb, make an indentation in each cookie ball.
8. Fill your thumbprint with 1/2 a tablespoon of your favorite jam.
9. Bake for about 12 minutes, or until the edges of the cookie are lightly brown and the jam begins to bubble.
9. Remove from oven and let cool on a wire rack.  Add a sprinkle in the middle of the jam if desired.


I added sprinkles to the dough because SPRINKLES.  It makes everything cuter, instantly yummier.

Along for the ride were my two kitchen mascots; Cupcake Andy in Vanilla and Chocolate.  They love sprinkles and sweets as much as me, and live next to my sprinkle jars.  (We all have sprinkle jars, is my assumption.)


And yes, I added some extra heart sprinkles in the cookies' jammy centers.  To cover all my bases.  :)


Aren't the polka dots on these plates adorable too?  I had a hard time choosing between dots, squares and hearts at the Daiso store last month.  I am running out (okay I ran out a long time ago) of places to stash prop plates though.


The tayberry tasted pretty awesome on these cookies.  And the boy agreed.  He had more than his fair share.  That means he totes ate his and proceeded to steal a few that were intended for others.  =x


 He is forgiven for his theft not only because I am generous and lovely, but because  I am just as bad of a cookie monster as he.  Okay, maybe worse.  I am in the last position to judge.


xo,
Anna

Monday, March 17, 2014

Lucky Chocolate White Chocolate Chip Cookies


Happy St. Patrick's Day!  My mind was on green clovers all weekend long, so I am obviously wearing a pretty green dress today.  No getting pinched here.

I have been trying to get my hands on General Mill's Special Edition of Lucky Charms with only green clovers since last year. They only come out once a year!  And I completely struck out last year so upon fearing the same fate this year, I sent a message to Lucky Charms directly to ask what store I could find them in.  And they answered me!  But even cooler yet, they mailed me a box of Lucky Charms goodies.  Yay swag!  Bet you can't wait to see me in my Lucky Charms shirt.


I set to work on Saturday morning, sorting out the bright green clover marshmallows.

And eating cereal too... there was some of that.


And then I stuck them in some chocolate cookies. And then took them on a hike on Sunday.  8 miles means all the cookies you can eat, right?


Lucky Chocolate White Chocolate Chip Cookies
Makes 30, bake at 350* for 8-10 minutes

1 cup butter
1 1/2 cups granulated sugar
2 eggs
2 tsp vanilla
2 cups flour
2/3 cups cocoa powder
3/4  tsp baking powder
1/4 tsp salt
1 3/4 cup white chocolate chips
1/2 cup green clover marshmallows
1/3 cup green clover marshmallows reserved

Directions:
1. Cream butter and sugar together in a stand mixer fitted with a paddle attachment.  Beat on medium until light and fluffy.
2. Add in eggs, one by one and scrape down the side of the bowl if necessary. Add vanilla.
3. In a separate bowl, combine flour,  cocoa powder, baking powder and salt.  (Whisk together by hand to fully combine ingredients.)
4. Add flour mixture to sugar mixture 1/2 cup at a time, with the mixer on low.  Stop mixer when fully incorporated.
5. Fold in white chocolate chips.
6. Hold in 1/2 cup green clovers.
7. Chill dough for at least 60 minutes in refrigerator.
8. With a medium cookie scoop, scoop out dough onto cookie tray lined with parchment paper.  
9. Add additional 2-4 green clovers on top of the dough before baking.
10. Bake for 8 - 10 minutes at 350*.  Cookies are done when tops are thoroughly baked, and no longer sticky when touched.
11. Remove from oven and let cool on wire rack.

These have been taste tested to be delicious.  By me.  You are welcome. They are super chocolatey, dense in flavor but really light in texture.  It's almost like biting into a brownie cookie!


One of the most amazing things about these cookies are the clover marshmallows.  In the cereal, like the regular Lucky Charms marshmallows, they are hard.  Once baked however, they puff up and turn into soft marshmallows!  So cute and yummy.


Enjoy the rest of your St. Patrick's Day!  Hopefully no one went too hard on the green beer this weekend and their morning is fairing well.  I went on that St. Patrick's Day hike on Sunday (green shamrock on the top of Mission peak!) and went way too hard on my knees so I'm not fairing terribly well.  But it's only Monday, and with any luck this gorgeous California weather we have been having will allow me to continue spending March wearing shorts, exploring the outdoors and eating half a pint of ice cream on my weekends.

xoxo,
Anna

Sunday, January 26, 2014

Eat Like a Bird: Trail Mix Cookies


Welcome to my obligatory January post about eating "healthy". This is ironic since this is, of course, a baking blog.  It also comes so late in the month that I think most people are over the always needed Christmas detox mentality.  But i'll sprinkle some of that in here to make us feel better ourselves.

These cookies are all about eating like a bird.  You can take that to mean many things. They are trail mix cookies -- which means it's a bunch of random things that birdies (or you) may like.  Sunflower seeds.  Almonds.  Oats.  Raisins. Chocolate chips.  Pretzels.  Birds would eat all that, right?   Or you can take it to mean, eat like a bird -- very little.  A few pieces of each ingredient are all that are in each of these cookies.  But how do birds actually eat?  All day long.  A mammoth amount compared to their body size.  Much like the frequency and quantity of baked goods that I consume in a day.   So really, the meaning is probably found in that last option.  Eat all the cookies.  All day long.  


The raisins and the chocolate chips make these cookies sweet, the pretzels and the sunflower makes them a little salty.  Part cookie, part trail mix bar really.   Part good for you?

Trail Mix Cookies
Makes 28, bake at 350* for 9 minutes.

1 cup flour
1/4 tsp baking soda
1/4 tsp baking powder 
1/4 tsp salt
1/2 tsp cinnamon
1/2 cup butter
1/2 cup granulated sugar
1/2 cup brown sugar
1 egg
1 tsp vanilla
1 cup oats
1 cup raisins
1/4 cup sunflower seeds
1/2 cup almonds
1 cup dark chocolate chips
1 cup pretzels

Directions:
1. In a mixing bowl whisk flour, baking soda and powder, cinnamon and salt and set aside.
2. In a stand mixer fitted with the paddle attachment, cream butter and sugars until light and fluffy.
3. Add in egg and vanilla and beat until fully incorporated.
4. Add flour to sugar mixture slowly and beat on medium until it forms a dough. 
5. Fold in oats, raisins, sunflower seeds, almonds and chocolate chips into dough.
6. Using a medium sized cookie scoop, scoop out balls of dough and place onto baking sheet.  
7.  Break pretzels into small pieces and place on top of balls. (If you mix them in when you fold in the rest of the ingredients they will break.)
8.  Bake in preheated oven for around 9 minutes.  Remove from oven and let cook on rack. 


Truth be told, I had to make these bad boys twice.  The first time was a fail. The next two weeks I would frown to myself whenever I thought about them.  The second time I excitedly Instagrammed them with the #cookieredemption hashtag.   


If you use a small or a medium sized cookie scoop, they will fit into the mouth of a mason jar.  You can screw on the lid and give them away.  Cookies make the perfect present after all. 


If they are too big to fit, force them in anyways.  Make it work, 'cuz everything is cuter in a mason jar with a ribbon tied around it.  


Also since it's fake spring in California  (no rain in months, sunshine and 70* in January), these bright blue birdies make me feel extra happy.  It's like a jar of sunshine.  

xoxo,
Anna

Tuesday, December 10, 2013

Chocolate Covered Gingerbread Madeleines


I do this thing every year where I decide to vacation during the month of November.  It's awesome because I get to to escape the city and the mundanes of daily life and sneak away for one last sun kissed tan in before the sun goes away for four months.  It's awful because I come home, catch a cold, have to wear pants because it's dropped 20* and oh look it's December!  I have no idea where November went this year... one minute I was on a boat in the Bahamas, the next I was back in the states, downing Gingerbread lattes, shopping for Christmas mugs at Target and planning fancy holiday outfits.

When it came time to decide what to bring to my friend Rachelle's cookie exchange -- while wearing my favorite hot pink fleece gingerbread pajamas and sipping gingerbread tea out of my gingerbread man mug mind you  --it was no surprise that I went with something gingerbread.  My first thought was my gingerbread chocolate chip cookies.  They're easy to make.  I've made them before.  But that seemed too boring for a cookie exchange.  Then I thought about how easy madeleines are to make and contemplated making some of those instead -they just look fancy.  While debating the hard question of which cookie to bake, I came to the realization that instead of choosing between the two, I could combine the two.  Hashtag Cookie Genius.

Taking a page from the chocolate dipped orange madeleines I made last year, I finished these gingerbread madeleines with a dark chocolate drizzle.    Gingerbread plus dark chocolate is one of my favorite holiday flavor combinations afterall.  Remember the Gingerbread S'mores Cupcakes?  


Gingerbread Madeleines
Adaptation Source.
Makes 34. Bake at 375* for 7-8 minutes.

4 room temp eggs
2/3 c. sugar
1/4 tsp salt
2 tsp vanilla
4 tbsp molasses
1 cup flour
1/2 tsp baking powder
1/4 tsp nutmeg
1/2 tsp cinnamon
1 tsp ginger
1/2 cup unsalted butter melted and cooled
1/2 cup dark chocolate chips
(Optional:  1 cup mini chocolate chips)

Directions:
1. Whisk together flour, baking soda, nutmeg, cinnamon and ginger and set aside.
2. In a stand mixer fitted with a paddle attachment, beat eggs on high for about three minutes.
3. Add salt to the eggs, and then the sugar.  Sugar should be added slowly over the course of five minutes by the spoonful.  Eggs will become white and frothy.
4. Add in vanilla and molasses and beat on high speed until fully incorporated.
5. Stop the stand mixer and fold in flour and butter in additions, starting and ending with the flour.  Mix until smooth.
6. Scoop batter into butter and floured madeleine pan and bake for about 7 minutes.
7.  Melt chocolate in microwave for 30 second intervals, stirring in between.  Scoop melted chocolate into a piping bag and decorate cookies once they are cooled.

Tip:  Madeleines taste best 1-3 days after baking.  This allows the butter flavor to really set in.


Do you know what taste's good with these?  Gingerbread tea.  In a gingerbread mug... lol.  I'm totally that girl.


I apologize for my Gingebread Cheer.  No not really.

Do you know what else you can do to these bad boys?  Add in mini chocolate chips to the batter (about 1 cup) for EXTRA chocolately goodness.  See?


How was the cookie exchange you may ask?  Awesome.  Who doesn't love a giant plate of cookies?


Or 10 plates of them.  Don't worry we did more than just eat our weight in butter and sugar.  We mixed up some royal icing and decorated some sugar cookies too. That counts as activity, right?


I have to bake again this weekend ('tis the season to get fat afterall).  I'll try not to wear my penguin pajamas as I think of a cookie/cupcake because I don't want to find out what penguins taste like.  =/

xoxo,
Anna

Monday, July 1, 2013

Oatmeal Cranberry White Chocolate Chip Cookies


By the time I post this, I will have made these cookies three, maybe four times.  They're that good.  They're really just like my regular oatmeal raisin cookies but instead of raisins they have cranberries and white chocolate chips.  So that obviously means they are delicious.  Let's be honest though, what cookie is not delicious?

I don't understand people who don't like oatmeal raisin cookies. So naturally, I won't understand anyone who does not like this cookie, either.  Dried fruit DOES have a place in sweet treats.  It's no fatty ice cream cookie sandwich, but it is something important with a rightful place in my internet cook book.


Cranberry White Chocolate Chip Cookies 
Makes 36, Bake at 350* for around 9 minutes

1 3/4 c. flour
1/2 tsp baking soda
1/2 tsp baking powder
1/2 tsp salt
2 tsp cinnamon
1 tsp nutmeg
1 c unsalted butter, room temp
1 c sugar
1 c brown sugar
2 egg
2 tsp vanilla
2 1/2 c oats
2/3 c dried craisins
1 c white chocolate chips

Directions:
1. In a bowl, whisk together flour, baking powder, baking soda, salt, cinnamon and nutmeg.
2. Cream butter and sugar together in a stand mixer.
3. Add in vanilla extract and egg and beat until fully incorporated.
4. Add in flour mixture to batter.
5. Fold in oats, then craisins, then the white chocolate chips
5. Scoop out dough balls onto parchment lined cookie sheets and bake until edges are brown.  DO NOT OVER BAKE!
6. Let set on cookie sheet for 1-3 minutes and then place on cooling rack.


I made these for a pool party, for a park BBQ and just a few weekends ago I baked some batches as part of a fundraiser/bake sale for the upcoming San Francisco Aids Walk on July 21, 2013.  There's been stacks and stacks of cookies at my house lately.


I've been baking for a few weeks now; a dozen cookies as a thank you to anyone who donates online to a good cause.   If you'd like to donate please feel free to support me by clicking here.  You never know, you may get a delivery of cookies at your door step yourself.   ;)

xoxo,
Anna

Sunday, January 6, 2013

Linzer Cookies


Linzer cookies have been on my "to bake" list for ages.  Literally months ago I bought half of the ingredients to make them but never did.  This past December though a co-worker started talking about them and I eagerly accepted a photocopied recipe out of her Parade magazine.  I mean they claimed to win best "rolled out cookie" for 2012.  Worth a try, no?


So when scheduling a baking date with my dear Rachelle (cuz you know, that's what we do) I knew that we had to make these.  She obliged and I think I now have to rename this blog "My Feelings Taste Like Cookies" because I seem to have forgotten how to make anything else this holiday season!

We used the food processor for this recipe, but not the stand mixer.  


Linzer Tart Cookies
Taken from Parade Magazine, December 2012.  
Bake for 10-12 minutes or until sides are golden at 350* 

3/4 c. unsalted almonds
1 1/2 c. sifted flour
1/2 c. butter, at room temp
1/2 cup confectioner's sugar
1 tsp lemon zest
1 egg, at room temp
Fruit preserves - any flavor
Confectioners sugar for dusting

Directions:
1. In a food processor, chop nuts and 1/4 c of the flour until fine.
2. In a bowl, combine nut/flour mixture, remaining 1 1/4 c. flour, butter, sugar, zest and egg.  Stir by hand until it turns doughy.
3.  Divide dough into two equal pieces and cover in plastic wrap.  Refrigerate for at least 30 minutes.
4.  Roll out dough on a floured surface.  Use Linzer cookie cutters to cut out bottom and tops of your sandwich cookies.  You will need an even amount.
5. Bake on parchment paper until sides are golden brown and let cool.
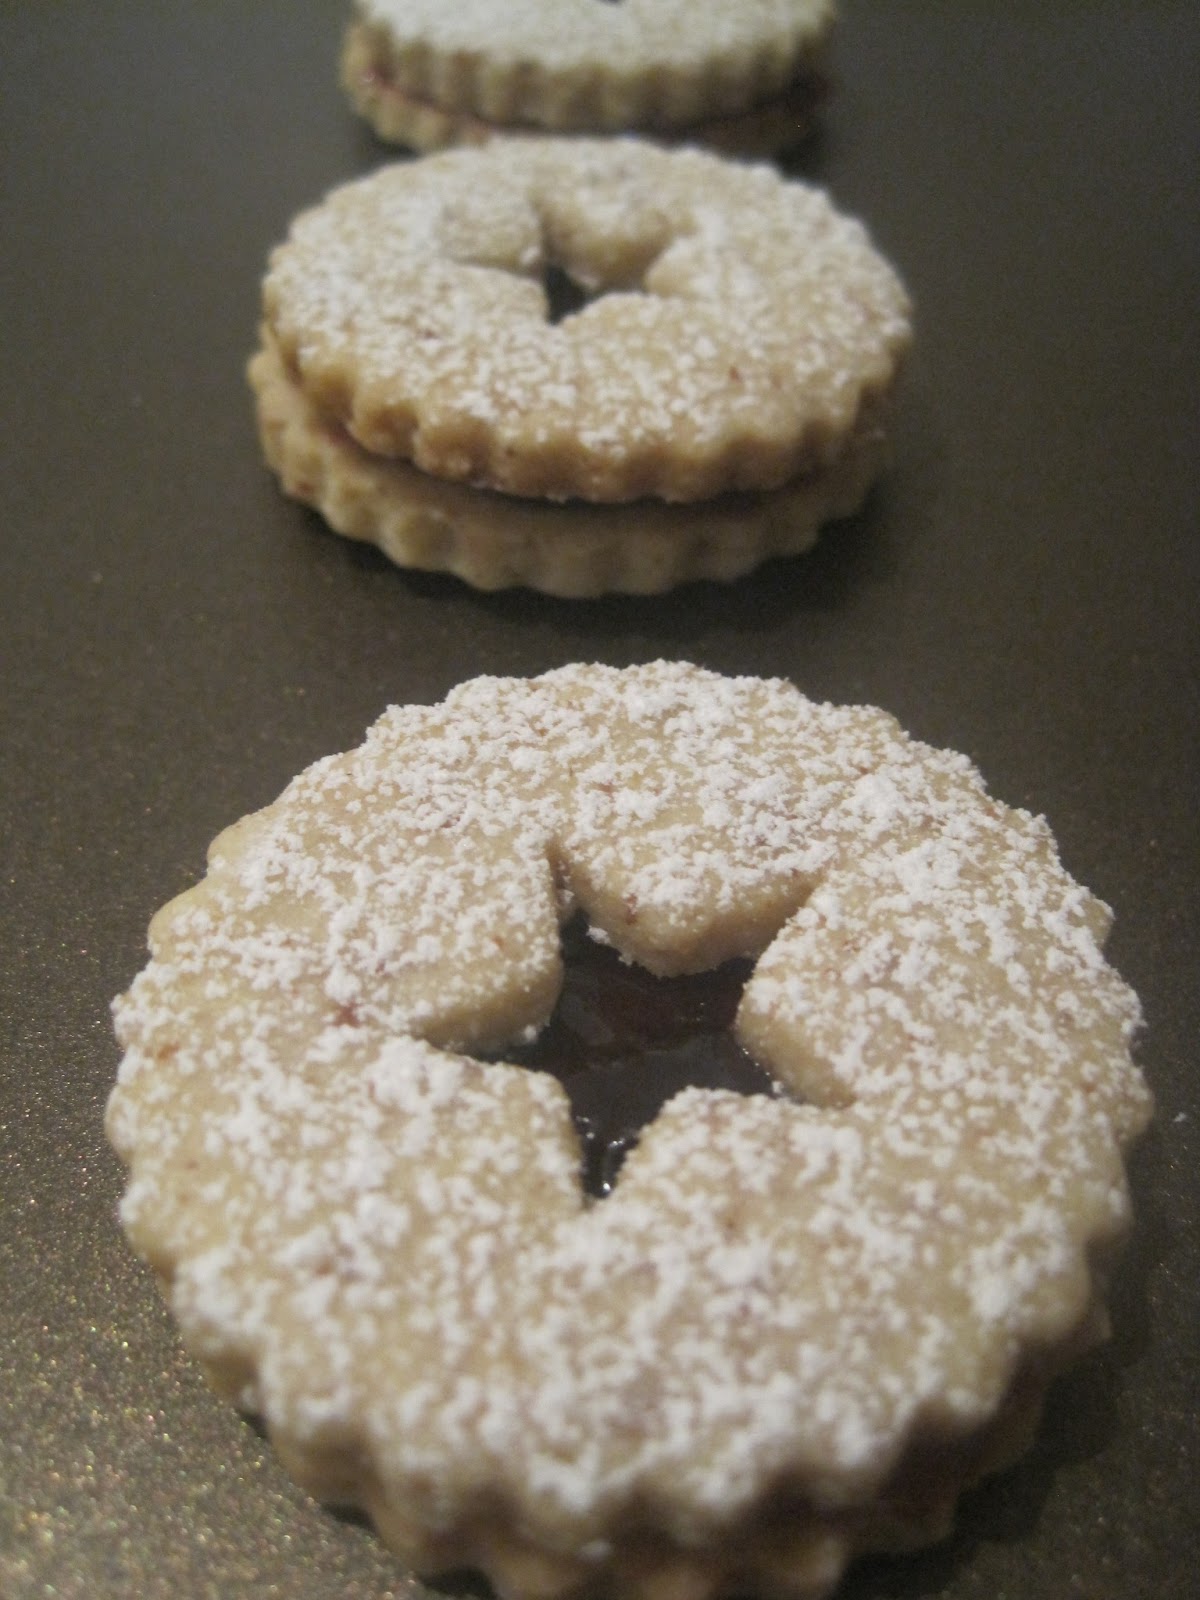
6. Spread fruit preserves on the bottom cookies.  On the tops (the ones with the cut outs), dust with  confectioners sugar.  Sandwich top cookie to bottom cookie.

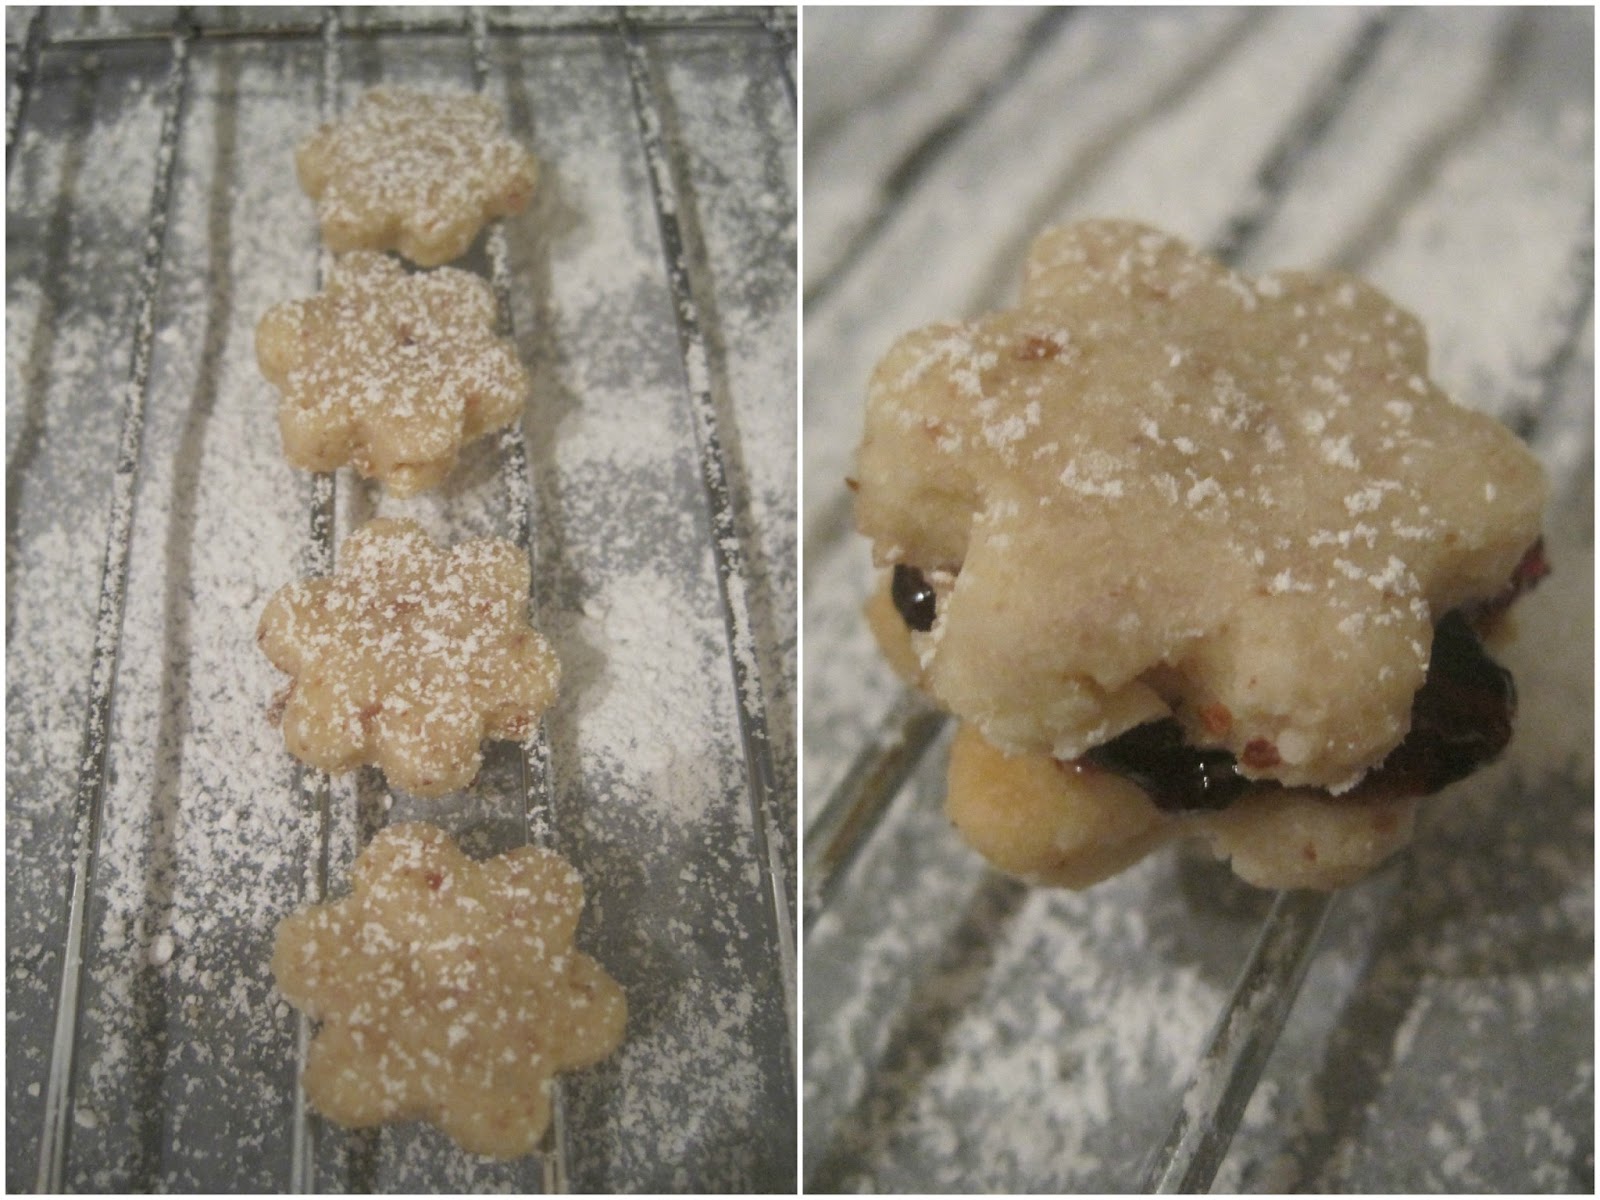
I sucked at using the cookie cutter by they way.  Rachelle did most of the stamping because I was making messes.  Aren't the baby cut outs cute though?  We used stars and flowers. But like the recipe mentions, they have winter linzer cookie cutters too with things like mittens on them!


For the fruit preserves I  bought apricot-pineapple and boysenberry.  You can use any preserve, but I chose a few little lesson common ones to make things interesting.  I really liked the boysenberry one, personally.


My tip to you is that you can't use enough preserves.  Add more before you sandwich them together.


We rolled out the cookies twice, the last time we couldn't reuse the middle cutouts so Rach decided to bake the few we had -- tiny equals cute people.  


And then we sandwiched them together too -  into teeny tiny bite sized cookies. Literally bite-sized!

Baking dates with Rach are the best.  If we fail, we fail together!  But two sharp minds with pretty solid baking instincts don't fail.  :)


We actually made these back in December but I had't had time to post about them. They came out too pretty not to though!  You can see the specks of lemon zest, the pieces of almonds and of course the preserves peaking out.  And truth be told, I have a thing for scalloped edges.


The stars were the boysenberry.


The flowers were the apricot-pineapple.


Now that the holidays are over I need to stop baking cookies and maybe learn to bake some vegetables.  So next week look for carrots.  Ha, totally kidding.  (Unless it's carrot cake.)

xoxo,
Anna