Showing posts with label DIY. Show all posts

Monday, July 21, 2014

Safari Giraffe Jars


Safari Giraffe Jars!  Giraffe Cookies!  Well, kinda giraffe cookies.  I had time to make these cute animal jars but not time to go my usual crazy pants self for the cookies.   Why not?  Because these were for Pam's bachelorette party last weekend and I was too busy crafting all the things to cut out tiny giraffe cookies like I had originally planned.  But they are color coordinated and let's face it -- adorable.  So all is well.


I made two batches of shortbread cookies; one chocolate chip and one orange almond.  (Recipes below)


And then I alternated cookies as I stuffed them in these decorated giraffe jars. 


To make jars like these you will need:
1. Clean Mason Jars
2. Stickers/Label for the front (Michael's)
3. Giraffe ribbon (Etsy)
4. Giraffe Charms (Etsy)
5. Plain Cupcake Liners (Michael's)
6. Hot Glue Gun

General Assembly Instructions:
1. Hot glue the ribbon around the side of the lid.  (I found it easiest to tie the ribbon in a bow and then attach it to the lid separately.)
2. Fill jar with yummy cookies.
3. Place the top lid over the jar, and then cover it with cupcake liners.  Screw on the side lid over the liner.
4. Hot glue charm on top of the liner.

Chocolate Chocolate Chip Shortbread Cookies
I followed this recipe, but omitted the orange zest and juice and added 1/2 cup of mini chocolate chips instead. 

Almond Orange Cookies
I followed this recipe, but added two small drops of orange food coloring instead.  Not enough to make them bright orange, just enough to make them more giraffe colored.  =)

Both recipes and flavors worked well together.  

But wait why was I making giraffe jars for a bachelorette party?  Because we went on a Safari, duh.   Pammy isn't big on the traditional Vegas-esque, drinking clubbing bachelorette parties and neither am I.  She's getting married at the zoo in September, so a Safari made sense.   And she's also going through a giraffe phase.  After all of this prep work  it kind of made me into a fan too! 


For the record the Safari was not in Africa. HAHA.  It was in Santa Rosa (Northern California) at Safari West.  Hopefully the bride to be had fun!  There were a bunch of animals to look at, we went glamour camping and took a "winos and rhinos" tour.  We dressed in animal print pith helmets and animal shirts.  Oh and I also made her wear a zebra veil that was attached to one of the hats because what on earth could she possible wear that day? You can see more pictures of the adventure on Pam's blog here.  

Aaaaand now it is time to plan Bachelor Party #2.  The life of a Maid of Honor is hard.  

xoxo,
Anna 

Monday, December 16, 2013

Reindeer (Cupcakes) in a Jar


Sometimes I feel like I am a caricature of myself.  I don't even think i'm a real person.  I am that ridiculous. Or awesome.

I decided this Holiday season that what my life was missing was cute holiday antlers.  I spent a whole week running into drug stores and trying on reindeer antlers I could parade around in comfortably and with little to no shame.  It was hard to find a happy medium between too plain and too much Christmas cheer on my head.   But I found some!  Luckily I had a White Elephant party to attend so I didn't have to wear them just around in my room, in my matching reindeer pajamas.  The antlers, along with said reindeer pajamas, were what inspired these cupcakes in the jar first place. Might as well go all out, right?


The cupcakes are gingerbread latte flavored.  Like the Starbucks Holiday drink I binge on every year.  Yes I know, more gingerbread.  Molasses all over the kitchen for the second weekend in a row!  You could use any flavor you'd  like but why not make something seasonal to impress your friends?


Gingerbread Latte Cupcakes
Makes 22, Bake for 15 minutes at 350*

2 1/2 c flour
1/2 tsp salt
2 tsp cinnamon
2 tsp ginger
1/2 tsp ground cloves
1/2 tsp nutmeg
1/2 brown sugar
1/4 c sugar
1/2 c oil
2/3 unsulphured molasses
2 eggs
2 tsp baking soda
1 cup (hot) strongly brewed coffee

Directions:
1. In a medium bowl, whisk the flour, baking soda, salt, cinnamon, ginger, cloves and nutmeg together.
2. In the bowl of a stand mixer, beat sugars, oil and molasses together, and add in eggs one by one.
3. Add in the flour mixture and the coffee in alternating additions to the sugar mixture.  Beat until fully incorporated.
5. Scoop batter into lined cupcakes and bake.  
6. Remove from oven and cool on wire rack until completely cool.  

Latte Frosting
1 8oz package cream cheese
1 1/2 sticks unsalted butter, room temp
4 cups powdered sugar
3 tablespoons VERY strongly brewed coffee

Directions:
1. Cream butter and sugar together until light and fluffy.
2.  Add 2 tablespoons coffee (or as much as you can before butter and cream cheese starts getting soft).
3. Slowly add in  3 cups powdered sugar by the 1/2 cup full.  
4. Add in remaining coffee.  Add in remaining sugar.


Reindeer Antlers
1 cup melted dark chocolate
1 bag pretzels
Assorted Sprinkles

Directions:
1. Break your pretzels with your hand or a knife until you get the antler "shape" you would like.
2. Melt chocolate in microwave in 30 second intervals.
3. Dip pretzel pieces in chocolate, cover completely and place on wax paper.
4. Before the chocolate dries, use sprinkles to decorate.  The sprinkles will adhere on their own if the chocolate is still wet. Make sure the antlers are dry before using.

Jar Assembly

Click here for instructions I used when I made my bunny jars last spring.  Easy peasy, promise.


Admittedly, the antlers were a little tedious to make but only because it is HARD to cut pretzel pieces into the right shape.

The last layer of frosting should be thick so that the chocolate antlers will stay in place.  You can also try making a small hole in the top cake layer with a knife and sticking the end of the antler there to keep it firmly in place.


Once I got to the sprinkle part I was having too much fun.  The possibilities are endless! Mostly I stuck with pretty snowflakes, some holly...


But I couldn't help myself.  Pink heart sprinkles exist for a reason.  I'm sure there are girl reindeer out there, right?


No?  Just me?  Just Anna the girl reindeer being ridiculous?  Yes, I did wear these all night long.  In every single picture.


Happy Holidays everyone!  Shop online, stay out of the mall, go to lots of boozey parties! Enjoy the next two weeks.  I know I will.  It's also my birthday this weekend and in case you are wondering there is no way that I will be baking ANYTHING.  Someone better bring me a cake.

xo,
Anna

P.S.  You can also stick some (stolen) Starbucks straws in these Gingerbread latte cupcakes if you're feeling lazy.  Still looks fancy pants!


Sunday, March 24, 2013

Rabbit Food: Carrot Cupcakes In A Jar


I am having rabbit issues this week.  During Christmas, if you follow me in Instagram, you will remember that I was OBSESSED with gingerbread men.  And then with foxes on my clothes.  This season it's bunnies.   It started when I found these little Easter rabbit figurines (jax!) at Walmart.  I had been wanting to make cupcakes in a jar for months and thought they'd work well for some special Easter treats.  DIY, cute packaging, spray paint?  Right up my alley.

I spray painted the seals white and the rims baby blue and glued the bunnies on top.  I used smaller mason jars, the half pint glass ones.  It took a few days to let the paint dry but it was a fun project! Purple or green would have been cute too.


What kind of cupcakes did I bake?  Well my new motto is "eat like an Easter rabbit"!  So I did. They're carrot cake cupcakes of course. Rabbits may eat carrots, but Easter Rabbits eat sugar, for sure.  I used the same recipe last year, and still can't be happier with the taste and texture. Love the pineapple and the walnuts in the batter.  You can go here to see the recipe.

The frosting I changed up slightly, it's still pineapple cream cheese frosting but I used  2 tablespoons of pineapple-apricot preserves instead of pineapple juice.  Either will work, but I liked the stronger flavor that came through by using the preserves.

Jar Assembly

1. Bake as directed, let cool completely & cut in half, horizontally.
*If you don't wait for them to cool they will fog up your little mason jars.  Be patient.
2. Layer them into the jars: Cake, frosting, cake, frosting, cake frosting.
*You can either fit one or one and half cupcakes inside one half pint jar, depending on how generously you frost.
* I used a 1M tip and moved the jar as I squeezed.  My tip to you is NOT to frost against the glass, but about 1/2 an inch away from it to keep it clean and pretty.  When you put the cake on top, press down slightly and it will move the frosting to the edge.
3. Before you place a cap over them, add additional garnish to the top of the jars.


I tied them off with white and gold baker's twine and included those little wooden ice cream spoons.


  What child, or adult would not love getting one of these?  Best part it that you can keep the jar once the cupcake has been eaten, and save it to store something else.  That's a gift that keeps on giving right there.


This bunny is just TOO cute.  I can't get enough of him.  Or his little wooden spoon.


Happy almost Easter guys!  You will get one more Bunny post out of me this week, so stay tuned!

xoxo,
Anna


Wednesday, July 18, 2012

DIY Cupcake Stands


I can too be one of those crafty girls.  You know, those girls with paint all over their cut off jeans and plaid shirts with messy, sexy I'm too busy being an artist to brush my hair looks to them? 

Well okay, I learned that I am not one of those crafty girls but I can certainly pretend with some degree of success.  I'm also good at spray painting my legs.  And gloves.  And the patio floor.  (At least not the dogs?)


I saw this picture on pinterest and tracked it down to be sourced from this site.  I got super excited and envisioned gorgeous pink cupcake stands all over the place and had no choice but to convince myself that I was capable of doing this on my own.  I then spent the next 3.5 weeks going to Michael's, Jo-Ann and Beverely's find the parts I needed.  Oh and Home Depot. lol.  In my head this project was going to take like one day to put together, and 15 minutes to execute.  In actuality? Not so much.  I spent 2 days spray painting things and making messes.  I think I shall stick to using my creativity for cupcakes, not crafts.


Here's some pictures and a quick run down of how my process went.

You will need:

1. Wood glue.  I bought Elmer's wood glue at Joann for about $3.00.

2. Spray paint you can use on wood.  I bought three cans of Rust-Oleum spray paint, at $3.87 each.  I only ended up using two of the three cans though.  Might make more... or return if I can find the receipt. I really love the pink I used; "berry pink".


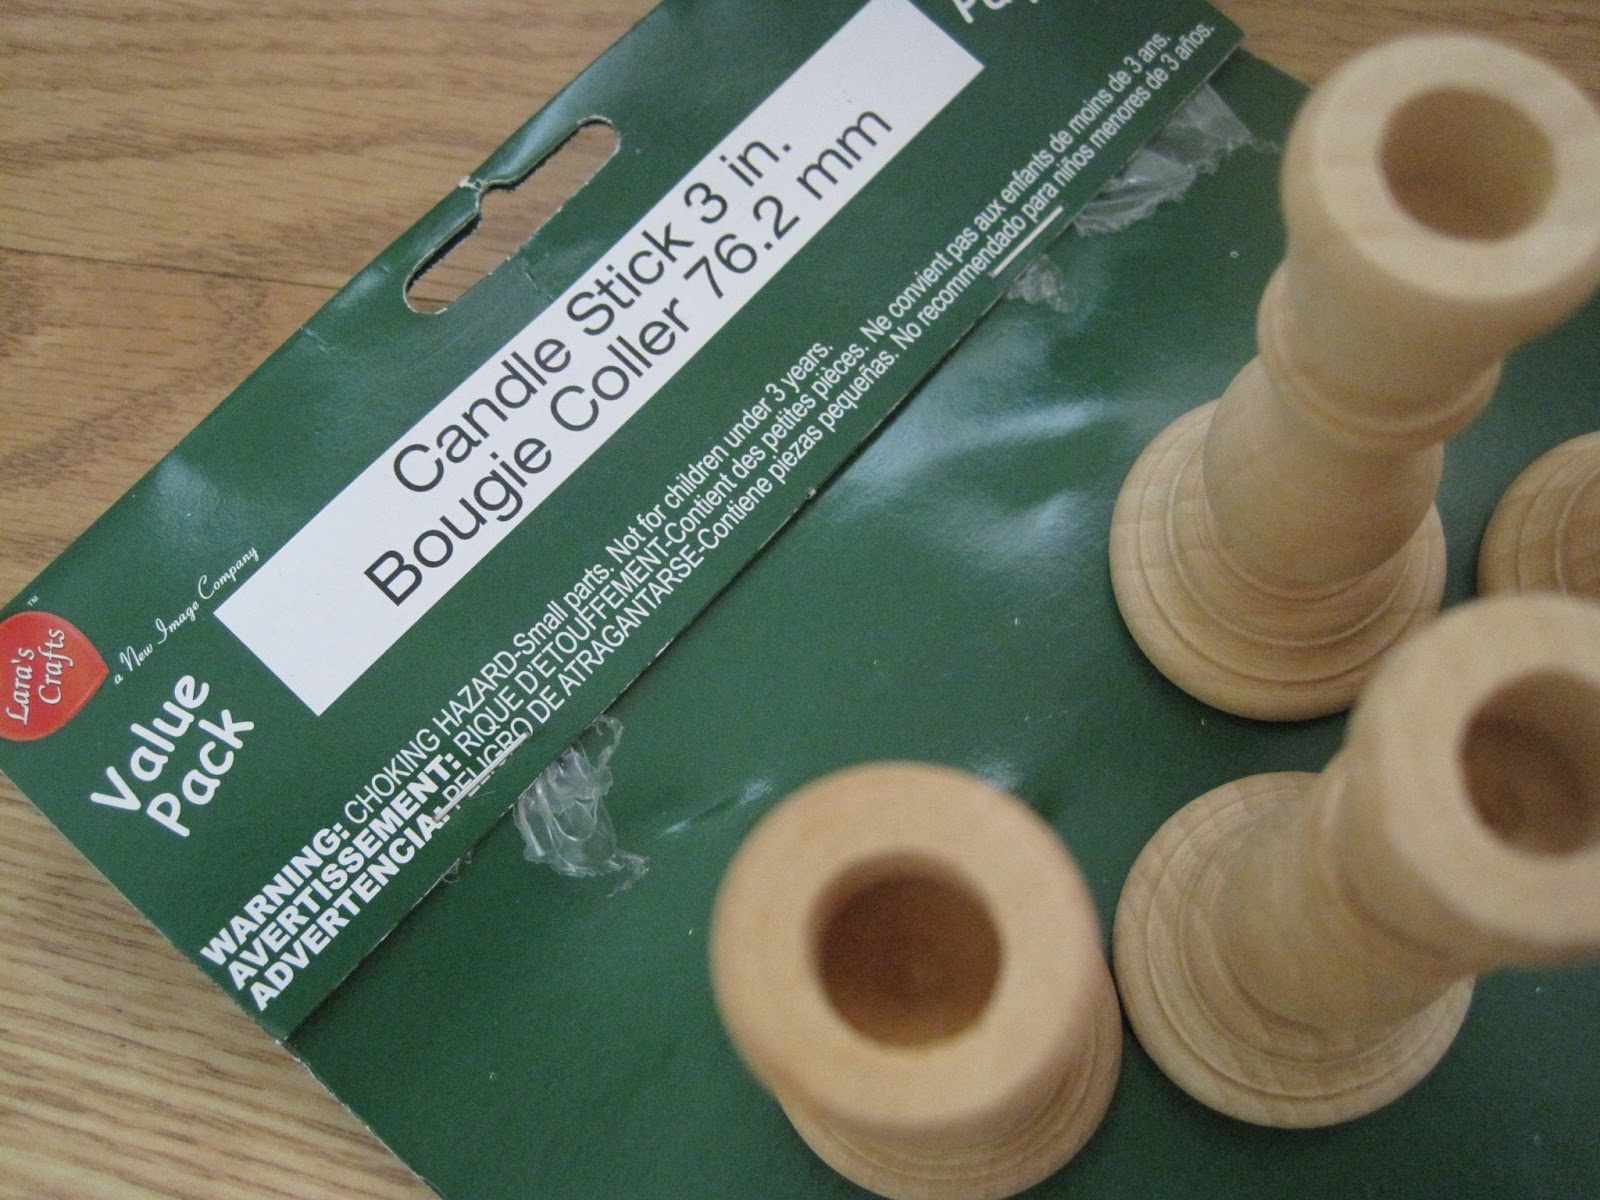
3. Packs of Lara's Crafts 3 inch wooden candlesticks.  They come in packs of 4.  I bought 5 packs at 2.99 each.  These were a pain in the butt to find.  None at Michael's or Jo-Ann.  I was about to order them online before I found them at Beverley's.  Well one pack, then I had to wait 3 weeks to get the other 4 packs in.  You see why this took so long?


4. Wooden circles and/or squares.  ($0.39 each)  Around 3 inches in diameter.  All the stores I had them, just not in stock.  So I ended up ordering circles at Michael's and picking up squares at Jo-Anne's.  The original tutorial called for cirles, but I wanted to mix it up so I did the squares as well.  I contemplated hearts too! But they were too small to work with.  Sad face.  But tip for those of you wishing to replicate this project; try buying at Jo-Ann's based only on the STICKER they put on them.   The one at Michael's take FOREVER to peel off.  


(It's also helpful to gather paper bags (newspaper sticks too easy) and plastic gloves so you don't get your fingers all spray painty.  In a related note, my camera might be spray painty.... lol.  Oops.)


First step is to take off those stupid stickers.  Make sure the surface had no stickyness to it and it is clean.  Since we will be gluing the candle stick to the center of the circles/squares, you might want to measure and mark it off with a sharpie like I did.


Then, just rim the top of the candle with your wood glue and place it upside down in the center. 


Press into place and repeat.  Repeat over and over again.  Leave to dry overnight.


It's helpful if you have a poodle underneath a bed to watch over this process.  But not necessary.

I did the white ones first, and learned some lessons along the way, so I am showing you the pink ones' progress. Also pink is much prettier and shows up on camera better.

In a well ventilated area, turn stand upside down and spray the sides of the candle stick and bottom.  Turn in a circle to try and coat evenly with a thin layer of paint.  Let dry for a few minutes and repeat.


 Let dry for a full hour and turn them over and repeat steps with the top of the stand.  Let dry overnight.  


If you missed any spots, go over with spray paint again and wait another 24 hours.  If you did a good job then they're ready for cupcakes!


They are far from perfect.  Haha.  I don't think I am a good spray painter... The pink ones more than the white ones have some areas where the spray paint went on a little bubbly.  =/  Maybe I should have primed them first.. or even painted them by hand. 


But they work!  And per unit were pretty cheap to make. And now I have a whole army of these little guys!  In hot pink AND in white.


I am going to use them for the first time in a week and a half.  (Nope, have not used them yet which is why the pictures do not feature a real cupcake haha.) Super excited about that, I think the little cupcake stands will look adorable!

'Till then!

xoxo,
Anna


Monday, January 30, 2012

DIY: Cupcake Liner Jar

I pinterest.  Do you pinterest?  It's how i take up my time in between tasks at work.  Or how i end up wasting hours at a time.  Mostly i look at things like all white kitchens with baby blue appliances that would look perfect in my pretend kitchen in my pretend house.

I found this pin though, and fell in love with it.  In loooove.


So easy.  So simple.  So pretty.  I had to try it.  I forced counter space in my small little kitchen.  I went to Wal-Mart and spent 8 bucks on a 1 gallon jar and 2 dollars at Michaels for ribbon. Then I added my oodles of cupcake liners.

The result was super awesome.  No, my picture is not as pretty as the one above. Yes, the lighting is horrible.  And i am aware you are probably sick of seeing my white tile and red brick counterspace.   But this one's mine and its pretty and it make me smile every time i walk by it.


Also, it lives next to my pink love birdies and cupcake spatulas so that automatically adds a layer of cool to it.


xoxo,
Anna