Wednesday, July 18, 2012

DIY Cupcake Stands


I can too be one of those crafty girls.  You know, those girls with paint all over their cut off jeans and plaid shirts with messy, sexy I'm too busy being an artist to brush my hair looks to them? 

Well okay, I learned that I am not one of those crafty girls but I can certainly pretend with some degree of success.  I'm also good at spray painting my legs.  And gloves.  And the patio floor.  (At least not the dogs?)


I saw this picture on pinterest and tracked it down to be sourced from this site.  I got super excited and envisioned gorgeous pink cupcake stands all over the place and had no choice but to convince myself that I was capable of doing this on my own.  I then spent the next 3.5 weeks going to Michael's, Jo-Ann and Beverely's find the parts I needed.  Oh and Home Depot. lol.  In my head this project was going to take like one day to put together, and 15 minutes to execute.  In actuality? Not so much.  I spent 2 days spray painting things and making messes.  I think I shall stick to using my creativity for cupcakes, not crafts.


Here's some pictures and a quick run down of how my process went.

You will need:

1. Wood glue.  I bought Elmer's wood glue at Joann for about $3.00.

2. Spray paint you can use on wood.  I bought three cans of Rust-Oleum spray paint, at $3.87 each.  I only ended up using two of the three cans though.  Might make more... or return if I can find the receipt. I really love the pink I used; "berry pink".


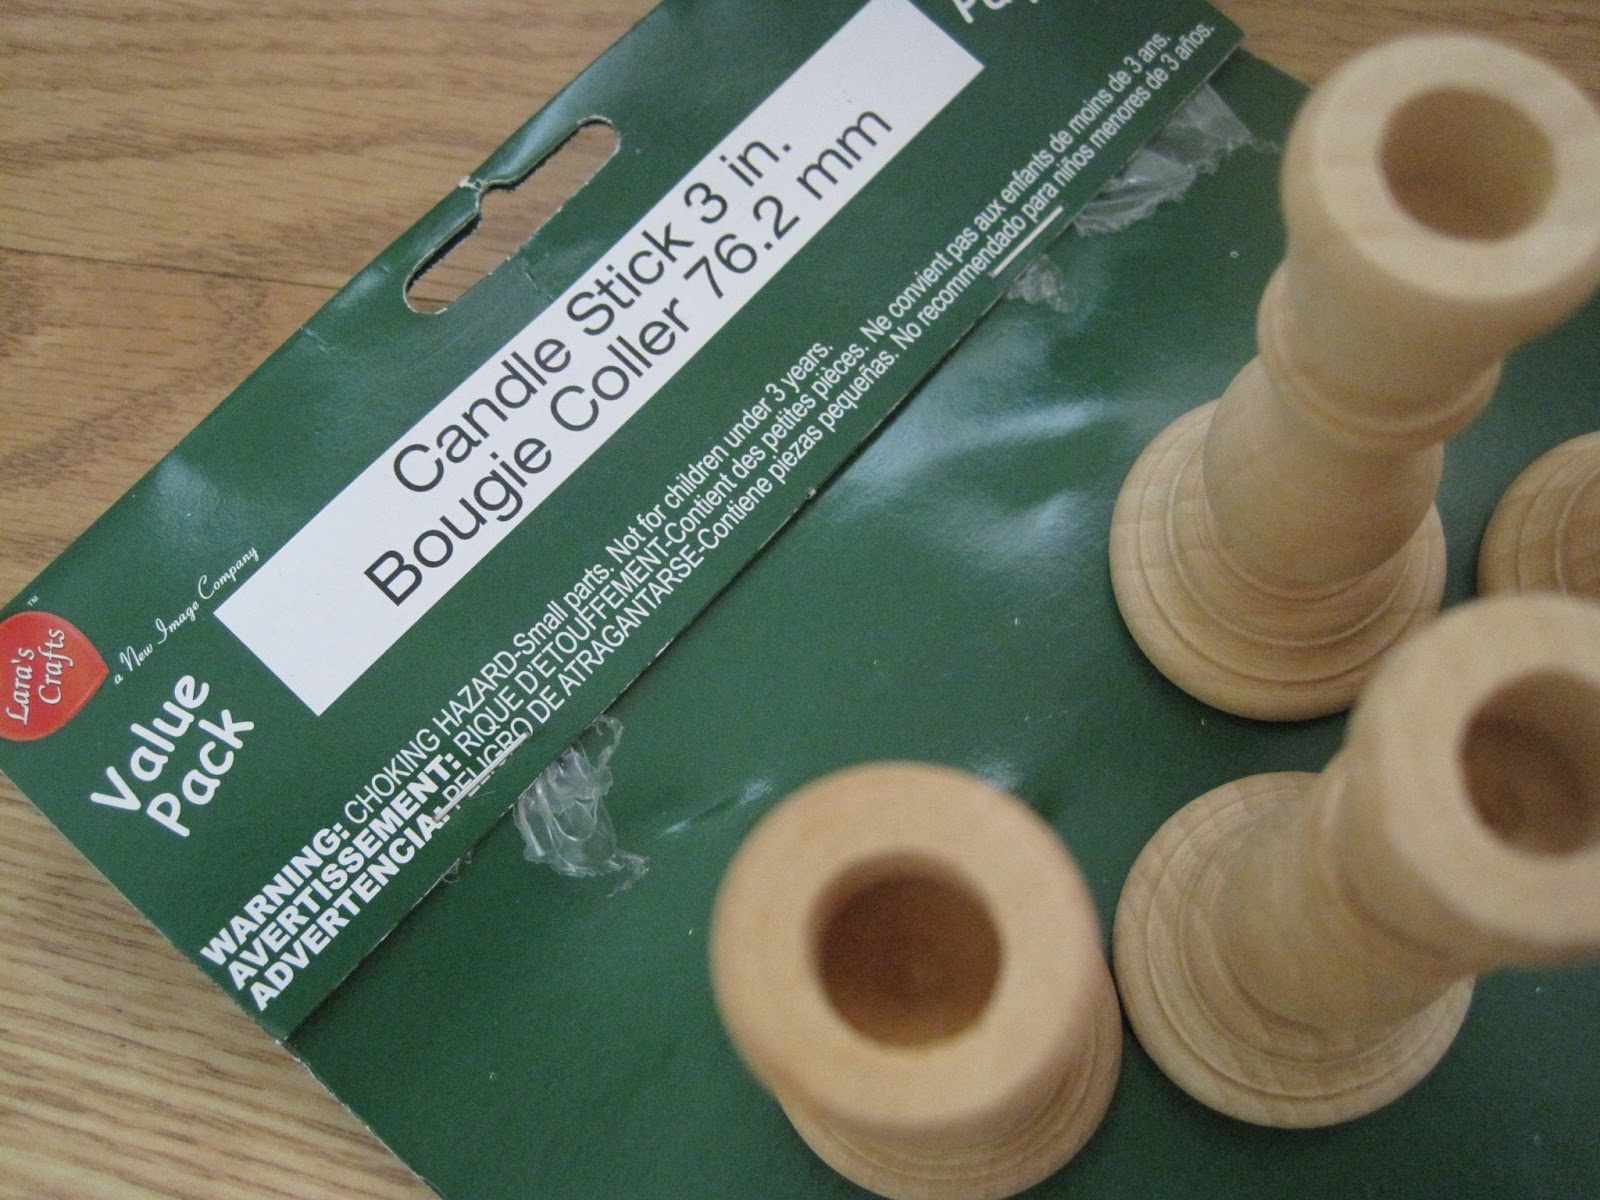
3. Packs of Lara's Crafts 3 inch wooden candlesticks.  They come in packs of 4.  I bought 5 packs at 2.99 each.  These were a pain in the butt to find.  None at Michael's or Jo-Ann.  I was about to order them online before I found them at Beverley's.  Well one pack, then I had to wait 3 weeks to get the other 4 packs in.  You see why this took so long?


4. Wooden circles and/or squares.  ($0.39 each)  Around 3 inches in diameter.  All the stores I had them, just not in stock.  So I ended up ordering circles at Michael's and picking up squares at Jo-Anne's.  The original tutorial called for cirles, but I wanted to mix it up so I did the squares as well.  I contemplated hearts too! But they were too small to work with.  Sad face.  But tip for those of you wishing to replicate this project; try buying at Jo-Ann's based only on the STICKER they put on them.   The one at Michael's take FOREVER to peel off.  


(It's also helpful to gather paper bags (newspaper sticks too easy) and plastic gloves so you don't get your fingers all spray painty.  In a related note, my camera might be spray painty.... lol.  Oops.)


First step is to take off those stupid stickers.  Make sure the surface had no stickyness to it and it is clean.  Since we will be gluing the candle stick to the center of the circles/squares, you might want to measure and mark it off with a sharpie like I did.


Then, just rim the top of the candle with your wood glue and place it upside down in the center. 


Press into place and repeat.  Repeat over and over again.  Leave to dry overnight.


It's helpful if you have a poodle underneath a bed to watch over this process.  But not necessary.

I did the white ones first, and learned some lessons along the way, so I am showing you the pink ones' progress. Also pink is much prettier and shows up on camera better.

In a well ventilated area, turn stand upside down and spray the sides of the candle stick and bottom.  Turn in a circle to try and coat evenly with a thin layer of paint.  Let dry for a few minutes and repeat.


 Let dry for a full hour and turn them over and repeat steps with the top of the stand.  Let dry overnight.  


If you missed any spots, go over with spray paint again and wait another 24 hours.  If you did a good job then they're ready for cupcakes!


They are far from perfect.  Haha.  I don't think I am a good spray painter... The pink ones more than the white ones have some areas where the spray paint went on a little bubbly.  =/  Maybe I should have primed them first.. or even painted them by hand. 


But they work!  And per unit were pretty cheap to make. And now I have a whole army of these little guys!  In hot pink AND in white.


I am going to use them for the first time in a week and a half.  (Nope, have not used them yet which is why the pictures do not feature a real cupcake haha.) Super excited about that, I think the little cupcake stands will look adorable!

'Till then!

xoxo,
Anna


Monday, July 2, 2012

"You Fancy, Huh?" Truffles


I never knew truffles were so easy to make.  But I googled "what to do with left over ganache" and I learned that they are so easy, everyone should just have a treasure trove of truffles at their daily dipsosal.  But then America would get squishier and we don't want that.  So for now we are not going to let people in on the secret.  We'll keep the truffles, and sadly- the squishyness, to ourselves.

My last baking adventure, Chocolate Covered Orange Madelines, combined with a lack of good sense on my part resulted in a huge bowl of ganache, nothing to dip it in and no time to find dippable things.  My google query solved my problem though, since I needed to pop the ganache in the fridge and let it chill.  I was free to go on with my day and deal with it the next day. Hoorah!

Literally all you must do is make your ganache.

Chocolate Ganache
Makes about 30 1/2 tablespoon sized truffles.


6 oz heavy cream
6 oz good quality dark cocoa chocolate
2 tablespoons butter

Directions:
1. Bring heavy cream to a simmer in sauce pan.
2. Pour over chopped chocolate (or chips) in a heat proof bowl and whisk until smooth.

Let cool.  Cover, and put in fridge for two hours or overnight.


Now you just scoop it out.  Originally I was all, I'll do it with a cookie scoop.  Nuh uh.  You need something smaller.  I used a measuring spoon.  I belive it was 1/2 tablespoon size.  The ganache is set, but still entirely pliable.  Scoop out a chunk.


Next you roll it around at your finger tips in order to make it a ball.  Or as close to a ball as possible because as soon as it hits your skin, the chocoalte will start to melt to work fast.  It doesn't look too pretty.  But it will be.   Once it's in a ball you are ready to cover it in something!


I literally opened up my baking cabinet and pulled out whatever I could find that sounded good.  I ended up with four toppings. Almonds.  (Because I ALWAYS have almonds.)  Graham crackers.  Cocoa powder. Powdered Sugar.  But the possibilities are almost endless!


Just roll the little chocoalte ball in the topping. 


You can place on wax paper until you're done, or immediately put them inside a mini cupcake liner.


And you're done.  HOW EASY WAS THAT? Seriously.

Almond Truffle

Cocoa Powder Truffle

I loved the almond (big surprise) and cocoa powdered ones best.  


The graham cracker ones were good too.  But I don't think I will repeat with the powdered sugar since the chocolate ganache absorbed it quickly and left the surface all crinkly.  Still tasted good though! Just a stickler for the aesthetics. 


Powdered Sugar Truffle

Graham Cracker Truffle


Eaten best when slightly chilled, since they get melty if in heat. You can keep these in your fridge for a few weeks. 

My best friend swung by the day I made them and ate some. And by some I mean I gave him 8 and he ate 4 all in immediate succession and his signficant other had to pull the plate away so that they would have any left. Haha.


I was busy this weekend by the way.  Being all DIY,  arts and craftsy.  I am almost done.  You'll have to come back next week for that though  :)  

xoxo,
Anna

Tuesday, June 26, 2012

Chocolate Covered Orange Madeleines (Go Giants!)


What on earth, you may ask, does an orange and the (2010 World Series Champs, holla) San Francisco Giants have to do with my little baking blog?

Everything, of course.  Because I baked orange madeleines (in flavor and in color) and then dipped them in chocolate ganache.  Orange and Black!  Just like my team's colors. And then I took them with me to our annual tail gating event.  (Bay Bridge Series; Oakland A's vs the SF Giants.  The stadiums are less than 20 miles away from each other and the rivalry gets fierce with so many fans on either side!  It's a summer highlight for me because I love baseball almost as much as I love my awesome friends.)

I'd source the madeleine recipe for you all if I could.  But I seriously got it off the back of my madeleine pan's cardboard wrapping when I first bought it.  

Orange Madeleines
Bake at 350* for 8 minutes. Makes 16. 


2/3 c flour
1/4 teaspoon baking powder
1/2 cup butter, melted and cooled
2 eggs
1/2 teaspoon orange extract
1/2 teaspoon shredded orange peel
1 cup powdered sugar
(optional orange gel food coloring)
Directions:
1. Sift flour and baking powder and set aside.
2. Beat eggs, orange peel and extract on high for 5 minutes.
3.Gradually beat in sugar for another five minutes/until thick.
4. Fold in flour.  Add food coloring if desired.
5. Fold in butter and mix until smooth.
6. Fill your Madeleine pan(s) and bake until edges start to lift.  Remove from pan and let cool on wire racks.


They came out, super orangey.  Yay!

Then the fun part.  Dipping them in chocolate. I used the same recipe for the ganache that I did for my raspberry double-decker cupcakes cuz it's totally delicious. 


By the way, every time that I unwrap a Ghirardelli baking bar and see the gold foil underneath I get excited.  It's like Willy Wonka and the Chocolate Factory and the golden ticket.  Cuz you win amazing things in your tummy everyyyy time.

Chocolate Ganache
3 oz heavy cream
3 oz good quality dark cocoa chocolate

Directions:
1. Bring heavy cream to a simmer in sauce pan.
2. Pour over chopped chocolate (or chips) in a heat proof bowl and whisk until smooth.


Get your cookies ready!  

Cuz now you just take your cooled cookie and dip half of it in the bowl.  Bonus points if your nails are awesome like mine.  A little smudgey, but awesome.


Place on wax paper or rack and let harden.  Refrigerate if necessary.  


You should note that my bowl is huge because I doubled the recipe you see above.  Like a dumbass. (More like I didn't reduce the original. Bad idea.)  I HAD SO MUCH GANACHE LEFT OVER lololol.  (I ended up using it all though.  I'll show you how next week!)  

Awesome way to show off my love for my team, right?  The flavors were awesome together too.  Orange + Chocolate = Nom. Need to make that into a cupcake at some point.  Maybe when we win the 2012 World Series?  ;)


Let me add just one more little thing though.... Better right?  Gotta rep' them all the way! 


Though I would like to point out that I love themes in general, so I did also make green and yellow drunk gummy bears (rummy gummies!) in honor of the A's.  Yup.  Gummi bears soaking in rum for a week.  Don't you want to tail gate with me?  'Till next year crappy A's stadium!  

xoxo,
Anna

P.S.  Yes, Gigantes is Giants in Spanish. 

Monday, June 4, 2012

Mint Chocolate Chip Cupcakes.. in Waffle Bowls!


THESE TASTE LIKE MINT CHOCOLATE CHIP ICE CREAM.

*Deep Breath.  Okay.

Wanted to get that out of the way right off the bat.

Also, I think it's safe to say that you want me at your summer bbqs.  (My schedule is filling up fast, however, so book early.)  These little babies are what I whipped up for one I attended on Sunday evening.

I don't remember how I decided on mint chocolate chip as a flavor.  Maybe because it was super warm last week  (high 80s) and refreshing and light things like mint sounded good.  But as soon as it was chosen, it was quite obvious that the theme would have be ice cream like as well.  And I dont just mean using an ice cream scooper to fill the liners.


 I spent a week bouncing ideas off of Pam, debating between cups or cones of waffle cones. (Thank you!!!)   I was resistant to it at first, but in the end necessity and time convinced me that I had to go with waffle bowls.  


And little wooden spoons. And fresh sprigs of mint (that I bought at Safeway only to find out later that I have oodles of mint growing in my own backyard.  Spanish Lesson for the day: Yerba Buena means is Spanish for mint.  This whole time I never knew! I just thought we had some weird fresh herb in the yards.  Oops.)


I used a new chocolate recipe for the cupcakes.  I am still in search of my Holy Grail chocolate cupcakes.  Does anyone have any recommendations?  Because the one that I used was by David Lebovitz, and it was good... but not UH-MAZING.  I strive for UH-MAZING afterall.

Chocolate Cupcakes
Makes 18, Bake for 15 minutes at 350*

9 tablespoons cocoa powder
1 1/2 cups cake flour
1/2 tsp salt
1 tsp baking soda
1/4 tsp baking powder
1 stick butter, room temp
1 1/2 cups sugar
2 eggs, room temp
1/2 cup cooled, strongly brewed coffee
1/2 cup low fat milk

Directions:
1. In one bowl, sift together cocoa powder, cake flour, salt, baking soda and baking powder and set aside.
2. In a cup, mix milk and coffee and set aside.
3. In mixer, cream butter and sugar together.  Add in vanilla.  Add in eggs one at a time.
4. Add flour and milk mixture in additions to mixer, beginning and ending with flour.
5. Scoop into cupcake liners and bake.  Let cool before frosting.

Truth be told though, I was a little terrified going into this one because the thought of using peppermint extract in something was pretty scary.  The chance for failure was high.  Every recipe that I read said to use peppermint but that makes me think of peppermint bark.. or even those York peppermint patties, neither of which I like.

A better blogger than I would look up the differences between peppermint and mint and why these came out awesome anyways.  Yeah.  I'll be a better blogger one day.  Today, we'll call is magic.

I looked up a good five recipes before deciding on not using any of them.  It's supposed to be ice cream like.  We needed some cream cheese up in there!

Mint Chocolate Chip Frosting

1 1/2 sticks butter, room temp
1/4 brick of full fat cream cheese
1/4 teaspoon salt
1/2 teaspoon vanilla extract
3/4 teaspoons peppermint extract
2.5* cups of powdered sugar
4 oz bar of dark chocolate (60% cocoa works good)
Itty bit of green food gel coloring

Directions:
1. Cream butter and cream cheese together until fluffy in stand mixer.
2. Add in powdered sugar.  *Feel free to use more powdered sugar, you probably should anyways, it will come out about the same and be firmer.  I just hate too much sugar.  I'd rather fatten people up with butter than sugar.)
3. Add in extracts, slowly.
4. Add food coloring, if desired.  I put about 5 SMALL drops of coloring in with the head of a toothpick.  I wanted a light color, and you probably do too so go easy.
5. Chop up your chocolate bar.  Don't feel like you need to put it all in, I ended using about 3/4 of it.  Make  big chunks. I use Ghirardelli because I am a Ghirardelli fan girl.  No shame in it.


6. Gently fold the chunks into the frosting.  My tip to you is to not just dump all the chocolate in there off of your cutting board.  When you chop it off, there are tiny little "crumbs" and shavings everywhere and this can dirty the frosting up.  Instead use the bigger chunks/pieces. 


This is where the fun part comes in.  Putting it all together!

I got some of the cupcakes naked (no liner) and put them inside waffle bowls.  They fit perfectly!


Then I took a small cookie scoop and filled it with frosting.  (DOESN'T IT LOOK LIKE ICE CREAM ALREADY???  At this point I am pretty sure I was actually giddy.)


I tried using a big ice cream scoop but that proved to be way too  much frosting for a cupcake.  I used a medium cookie scoop to "frost" the cupcakes.  But if you like that kind of thing, double (or even triple) the recipe and go for it!  And let me tell you, frosting with a scoop is so much more fun than with a piping bag, haha.

Then just add a little bit of mint for garnish and stick a spoon in it (I found my little wooden spoons at JoAnn's for 3.99)  and you are done.


Again, I made just a few with waffle bowls but I don't think that anyone ate the leftover bowl.  Everyone did use their spoons though!  It was cute, lol. And unnecessary but made me happy I found the spoons.   I made a lot with just white liners too.  Or if you can find them, you can also put them in little ice cream cups! And maybe drizzle them with ganache? Mint ganache.  I had toyed with the idea of doing so, but I ran out of time because my best friend held me up an hour away while he plowed himself with bottomless mimosas, lol.  Next time!


Best part was that even though it's a lot of chocolate, they still remained light and refreshing.  This only make me hopeful for the few other things I have in my head.  Hopefully you'll see those soon, too.  For now let's just be happy I finally posted something that was not a cookie...

xoxo,
Anna